The Importance of Prompt Mold Removal Deltona FL to Protect Your Home
Mold is more than just an unsightly nuisance; it can cause significant issues for both your health and your home if left unchecked. Delaying mold remediation can lead to worsening conditions that are both costly and difficult to reverse. Addressing mold problems promptly is critical to maintaining a safe, healthy, and structurally sound living environment.
The Dangers of Delaying Mold Removal
- Health Risks Increase: Prolonged exposure to mold spores can exacerbate allergies, asthma, and respiratory illnesses. Individuals with compromised immune systems are especially vulnerable.
- Structural Damage Worsens: Mold eats away at structural components like wooden beams or drywall, weakening the integrity of your home over time.
- Higher Costs for Remediation: The longer you wait, the more extensive—and expensive—the remediation process becomes due to increased spread of the infestation.
Common Causes of Mold Growth
- Leaking Pipes: Small plumbing leaks often go unnoticed until significant damage occurs.
- Condensation Issues: Poor insulation or high humidity levels can lead to condensation buildup on windows or walls.
- Roof Leaks: Water infiltrating through a damaged roof creates a perfect breeding ground for mold in attics or ceilings.
- Flooding: Improperly dried areas after water damage can result in severe mold outbreaks.
Long-term Impacts on Your Home
| Structural Component | Impact of Mold |
| Drywall | Weakens integrity; may crumble over time |
| Wooden Beams | Rotting and loss of strength |
| Insulation | Reduced effectiveness; requires replacement |
| Flooring (Carpets/Wood) | Warping and discoloration |
Addressing these issues early ensures that repairs remain manageable rather than turning into full-scale replacements.
Steps for Timely Action
- Inspect areas prone to dampness (e.g., basements, bathrooms) regularly.
- Address sources of moisture immediately by repairing leaks or improving ventilation.
- Consult professional remediation services rather than attempting DIY methods if the infestation is extensive.
Taking immediate action saves money, preserves the value of your home, and ensures a healthier living space for everyone involved.
Effective Mold Remediation Deltona FL: Preventing Structural Damage
Mold growth in your home is not just an eyesore or a potential health hazard; it can also lead to significant structural damage if left untreated. Understanding how mold impacts various parts of your home and learning effective prevention strategies is essential for preserving the integrity, safety, and value of your property.
How Mold Causes Structural Damage
- Wood Rot: Mold feeds on organic materials like wood, breaking down its fibers and causing it to weaken or rot. This can compromise support beams, floor joists, or furniture.
- Drywall Deterioration: Drywall is highly susceptible to mold infestation. Once drywall absorbs moisture, mold begins growing inside it, leading to crumbling walls that may need complete replacement.
- Foundation Cracks: When mold grows near or around your home’s foundation due to persistent water exposure, it can exacerbate existing cracks or create new ones as the material weakens over time.
- Insulation Damage: Mold growing on insulation degrades its efficiency and functionality. Contaminated insulation often needs removal because cleaning it thoroughly is nearly impossible.
Areas Most at Risk for Mold-Induced Damage
| Area | Common Cause of Moisture | Risk Level |
| Basements | Poor ventilation or water seepage | High |
| Roofs and Attics | Leaking roofs or improper ventilation | High |
| Bathrooms | High humidity and plumbing leaks | Moderate |
| Kitchens | Leaking pipes under sinks | Moderate |
| Windowsills | Condensation buildup | Low |
Preventing Structural Damage from Mold
- Control Humidity Levels
Keep indoor humidity levels between 30%–50% using dehumidifiers or air conditioners in high-moisture areas like basements and bathrooms. - Fix Water Leaks Promptly
Inspect plumbing fixtures, pipes, and roofs regularly for signs of leaks. Repair any issues as soon as they arise. - Ensure Proper Ventilation
Use exhaust fans in kitchens and bathrooms to prevent moisture buildup during cooking or showering. - Address Foundation Issues
Seal cracks in the foundation with appropriate materials to prevent water infiltration. - Inspect Vulnerable Areas Frequently
Conduct routine checks in basements, attics, crawlspaces, and other damp areas for early signs of water intrusion or mold growth. - Use Mold-Resistant Materials During Renovations Opt for mold-resistant drywall or treated wood when building new structures or upgrading existing ones.
When You Need Professional Assistance
While small patches of surface-level mold may seem manageable with DIY approaches like cleaning solutions designed for these purposes (not bleach), more severe cases demand professional intervention. Professionals have specialized tools such as infrared cameras that detect hidden moisture sources behind walls or under floors—areas where structural damage often begins unnoticed.
Ignoring early warning signs like musty odors, discoloration on surfaces, peeling paint, sagging floors, or warped walls could result in costs far exceeding what preventative action would require.
By understanding how mold causes structural damage and adopting preventive measures today, you safeguard not only the durability of your home but also avoid unnecessary expenses down the line—while ensuring a safer living environment for everyone inside it.
Preventing Structural Damage from Black Mold in Deltona FL
Mold growth in your home is not just a cosmetic or health concern—it can significantly impact the structural integrity of the building. Understanding how mold damages structures and taking proactive steps to prevent it are essential for preserving the safety, value, and longevity of your property.
How Mold Causes Structural Damage
- Wood Decay: Mold feeds on organic materials like wood, breaking them down over time. This weakens wooden beams, floorboards, and other support structures.
- Drywall Deterioration: Drywall absorbs moisture easily. Prolonged exposure to mold can cause it to break apart or crumble.
- Compromised Insulation: Mold growing within insulation reduces its effectiveness, leading to energy inefficiency and further moisture problems.
- Foundation Issues: In severe cases where water intrusion goes unchecked, mold can permeate through cracks in concrete or foundations.
Over time, if left unaddressed, these issues can lead to costly repairs or make parts of your home unsafe for occupation.
Signs Your Home May Be Experiencing Mold-Related Damage
- Warped or buckled flooring
- Softened or sagging drywall
- Rotting wood components in walls or ceilings
- Persistent musty odors
- Visible black or green patches on walls and ceilings
- Excessive condensation around windows or pipes
Preventing Structural Damage Caused by Mold
Preventing mold growth is easier than addressing its consequences. Taking proactive measures can save you both time and money while ensuring your home remains structurally sound.
- Maintain indoor humidity levels below 50% using dehumidifiers if necessary.
- Repair leaks in roofs, pipes, windows, or foundations promptly.
- Use exhaust fans in bathrooms and kitchens to reduce excess humidity.
- Keep your home well-ventilated by opening windows when possible.
- Install ventilation systems in areas prone to excess moisture (e.g., basements).
- Check for visible signs of water damage around plumbing fixtures, under sinks, and near windows.
- Inspect attics and crawl spaces periodically for any signs of dampness or discoloration.
- Opt for water-resistant building materials such as treated wood or mold-resistant drywall during renovations.
- Clear gutters regularly to prevent water buildup near your foundation.
- Grade landscaping so that water flows away from your home’s base.
| Building Material | Risk Level if Exposed to Mold | Suggested Preventative Measure |
| Wood | High | Apply sealants; ensure proper ventilation |
| Drywall | High | Use mold-resistant varieties |
| Insulation | Moderate | Replace damaged sections immediately |
| Concrete | Low | Seal cracks; control surrounding moisture |
When Professional Help Is Necessary
- If the affected area exceeds 10 square feet as recommended by the EPA.
- When you notice persistent issues despite implementing measures such as fixing leaks and improving ventilation.
- If structural components like beams show significant deterioration due to rot caused by prolonged exposure.
Professional remediation teams such as deltonamoldremoval.org not only address existing damage but also identify root causes of recurring problems such as hidden leaks or inadequate air circulation systems.
By staying vigilant against early warning signs and proactively managing moisture control strategies within your home environment—you’ll significantly lower risks associated with structural deterioration caused by unchecked mold growth over time while maintaining a safe living space for all occupants involved.
The Importance of Scheduling a Mold Inspection Deltona FL to Prevent Costly Damage
Ignoring mold growth in your home can lead to significant financial repercussions over time. Many homeowners underestimate the potential costs associated with uncontrolled mold, often dismissing it as a minor issue. However, failure to address mold promptly can result in compounded expenses that affect property value, repair needs, and even health-related costs.
1. Increased Repair Costs
When mold is left untreated, it spreads quickly and can compromise the structural integrity of your home. The longer you delay remediation, the more extensive (and expensive) the necessary repairs will be. Common areas affected include:
– Drywall and Insulation: Mold feeds on organic materials like paper backing in drywall or cellulose in insulation, requiring complete replacement in many cases.
– Flooring: Carpets, hardwood floors, and subflooring can become irreparably damaged by prolonged exposure to mold growth and moisture.
– HVAC Systems: Mold spores can infiltrate ductwork and HVAC systems, necessitating costly cleaning or even full system replacements.
The cost of remediation skyrockets with larger infestations, as contractors may need to remove and replace entire sections of walls or flooring.
2. Decline in Property Value
A home with visible signs of mold or a history of previous infestations is less attractive to potential buyers. Real estate experts frequently cite mold as one of the top reasons for reduced property value. Key issues include:
– Disclosure Requirements: In many jurisdictions, sellers are required to disclose known issues like past water damage or mold presence during property transactions.
– Failed Inspections: Mold often leads to failed inspections during the sale process, forcing sellers to remediate problems before closing deals at their own expense.
Failing to address a persistent mold problem could result in a lower selling price—or worse—render the house unsellable without major renovations.
3. Escalating Health Costs for Occupants
Uncontrolled mold growth isn’t just harmful to your home; it also poses risks to your health that can translate into financial burdens due to medical expenses or lost productivity from illness. Health concerns linked to prolonged exposure include:
– Respiratory problems such as asthma or chronic bronchitis exacerbated by airborne spores. – Allergic reactions ranging from skin irritation to severe responses requiring medical attention. – Long-term health complications for individuals with weakened immune systems.
Treating these conditions over time could add up significantly in terms of doctor visits, medications, and missed workdays—all preventable if mold is addressed early.
4. Legal Risks Stemming from Neglect
Landlords and property managers who fail to remediate visible or reported cases of mold risk facing lawsuits due to negligence claims filed by tenants experiencing adverse health effects or uninhabitable living conditions.
Legal repercussions may involve payouts for damages or compensation agreements that far exceed what addressing the initial problem would have cost.
| Category | Potential Cost Range | Example Scenarios |
| Minor Repairs | $500 – $1,500 | Replacing small drywall sections |
| Major Remediation | $3,000 – $10,000+ | Removing widespread infestations |
| HVAC System Cleaning | $1,000 – $5,000 | Ductwork cleaning/replacement |
| Property Value Reduction | 10%-25% Loss | Decreased marketability |
Ignoring uncontrolled mold growth not only impacts your home’s functionality but also creates unnecessary financial stress down the line through repair needs, devaluation risks, healthcare concerns—and even legal challenges where applicable. Remediation is not optional; it’s an investment toward maintaining both your property’s integrity and your peace of mind long term.
Why Professional Mold Testing Deltona FL Services Are Better Than DIY Solutions
When dealing with mold in your home, it may be tempting to take matters into your own hands and attempt a DIY solution. However, while this approach might seem cost-effective and straightforward initially, it often leads to incomplete remediation, potential health risks, and even higher long-term costs. Understanding why DIY mold removal isn’t always effective can help you make an informed decision when tackling this issue.
Limited Effectiveness of Store-Bought Products
Many homeowners rely on store-bought mold removal sprays or homemade solutions, such as vinegar or bleach. While these products may appear effective at first glance—especially for surface-level mold—they do not address the root cause of the problem.
- Surface Cleaning Only: Most store-bought products are designed to clean visible mold but fail to penetrate porous materials like drywall, wood, or carpet where spores can thrive.
- Regrowth Risk: Without addressing the underlying moisture issue that caused the mold growth, the problem will likely recur within a short period.
- Incomplete Eradication: Mold often spreads beyond what is visible. DIY efforts frequently leave behind spores in hidden areas like behind walls and under floors.
Lack of Proper Equipment and Expertise
Professional mold remediation companies use specialized equipment and follow industry-standard procedures to ensure thorough removal. Unfortunately, most homeowners lack access to this level of expertise and tools.
- HEPA (High-Efficiency Particulate Air) vacuums for capturing airborne spores.
- Moisture meters to detect hidden water sources.
- Industrial-grade dehumidifiers for moisture control during remediation.
- Negative air machines to isolate contaminated areas.
Without these tools or a proper understanding of how mold behaves in different environments, DIY cleaning efforts are unlikely to achieve lasting results.
Health Risks Associated with Improper Handling
Mold releases microscopic spores into the air when disturbed. These spores can cause various health issues if inhaled or come into contact with skin. Attempting DIY cleanup without proper protective gear increases your exposure risk.
Common health risks include: – Respiratory problems such as asthma flare-ups or allergic reactions. – Sinus congestion, coughing, and throat irritation due to spore inhalation. – Skin irritation from direct contact with certain types of molds.
Professionals wear certified personal protective equipment (PPE), including respirators and gloves, ensuring safety throughout the process—something that is hard for a homeowner to replicate effectively.
Hidden Costs of Inadequate Remediation
| Cost Factor | DIY Mold Removal | Professional Remediation |
| Initial Supplies/Products | Low | Moderate |
| Risk of Recurrence | High | Low |
| Long-Term Structural Damage | Likely | Unlikely |
| Health Complications | Possible | Rare |
Although professional services may come with higher upfront costs, they often save homeowners significant money in preventing further damage down the road.
The Importance of Professional Inspections
Unlike DIY approaches that focus only on visibly affected areas, professional remediation includes thorough inspections using advanced tools like infrared thermal imaging cameras. This ensures every area affected by moisture—and therefore at risk of harboring mold—is identified and addressed.
Professionals also assess ventilation systems such as HVAC units that could unknowingly spread spores throughout your home if left untreated—something rarely considered during a DIY cleanup effort.
Final Thoughts
DIY solutions may work for very minor cases involving surface-level problems; however, they are not recommended for significant infestations or cases where structural integrity or health risks are involved. Trusting trained professionals equipped with industry-grade tools ensures not just effective remediation but also peace of mind knowing your home is safe from future outbreaks.
Essential Tips from a Mold Removal Company Deltona FL for Detecting Hidden Water Damage and Mold in Your Home
Addressing mold issues in your home starts with detection. Often, mold problems stem from hidden water damage that is not immediately visible. Learning how to recognize these signs can save you time, money, and protect your health.
Common Sources of Hidden Water Damage
Water damage may not always be apparent at first glance. Here are some common but often overlooked sources:
– Leaky Pipes: Small leaks behind walls or under sinks can lead to moisture buildup over time.
– Roof Leaks: Damaged shingles or flashing can allow water to seep into attics and ceilings.
– Condensation: Excessive condensation around windows, pipes, or HVAC systems creates an environment conducive to mold growth.
– Flooding Residue: Areas affected by past flooding may harbor hidden dampness long after the surface appears dry.
Signs of Hidden Water Damage
Identifying the early signs of water damage is crucial for preventing mold growth:
– Discoloration on Walls or Ceilings: Yellow, brown, or dark stains are indicators of moisture penetration.
– Peeling Paint or Wallpaper: Bubbling or flaking surfaces often suggest dampness underneath.
– Warped Flooring: Wooden floors that buckle, cup, or warp may indicate prolonged exposure to moisture.
– Musty Odor: Persistent earthy smells often signal hidden mold colonies fueled by unseen water sources.
Identifying Mold Growth in Your Home
- Mold commonly appears as black, green, white, or even orange spots on surfaces such as walls, ceilings, tiles, and furniture.
- If household members experience persistent coughing, sneezing, skin irritation, or respiratory discomfort indoors but not elsewhere, mold might be the cause.
- Areas previously marked by stains from leaks can quickly become a breeding ground for mold if left untreated.
- Crumbling drywall, decaying wood structures, or unexplainable softness in building materials could indicate ongoing mold activity behind surfaces.
Proactive Steps for Detection
| Action Step | Importance |
| Regular Inspection | Perform frequent checks around windowsills, basements, attics, and crawl spaces for any signs of dampness or leaks. |
| Monitor Humidity Levels | Use a hygrometer to ensure indoor humidity stays below 50%. |
| Investigate Unusual Smells | Do not ignore persistent musty odors; they often point to concealed issues. |
| Fix Leaks Immediately | Address plumbing issues promptly before they escalate into bigger problems. |
By understanding where hidden water damage occurs and learning how to identify early signs of mold growth effectively through visual observations and environmental monitoring tools like hygrometers—homeowners can take preventive steps before minor repairs turn into costly remediation projects.
Avoid This Common Mistake: Why Bleach Doesn’t Effectively Kill Mold
When faced with a mold issue, many homeowners turn to bleach as their first line of defense. While bleach is commonly perceived as a quick and inexpensive solution, it is not an effective method for removing mold. In fact, relying on bleach for mold remediation can lead to more harm than good. Understanding why bleach falls short and exploring better alternatives can save you time, money, and prevent further complications.
Why Bleach Isn’t Effective for Mold Removal
- Limited Penetration
Bleach works primarily on non-porous surfaces such as glass or tiles but fails to address mold growing in porous materials like drywall, wood, or fabric. Mold roots (called hyphae) embed deeply into these materials. While bleach may clean surface stains, it does not penetrate deeply enough to kill the underlying mold colony. - Moisture Content in Bleach
Chlorine bleach contains a high percentage of water. When applied to porous surfaces, the water can soak into the material, creating an environment conducive to future mold growth. Ironically, this can exacerbate the problem rather than solve it. - Ineffectiveness Against Certain Mold Types
Not all types of mold respond to the chemical properties of chlorine in bleach. Some species develop resistance or are unaffected by its application entirely. - Health Risks from Bleach Use
Prolonged exposure to bleach can pose health risks such as respiratory irritation and eye discomfort. Instead of eliminating health hazards caused by mold, using bleach may contribute additional risks during application in poorly ventilated areas.
Better Alternatives for Removing Mold
- Specialized Fungicides: Mold remediation products designed specifically for killing mold are more effective at eliminating colonies without contributing excess moisture.
- White Vinegar: With natural antimicrobial properties, white vinegar can kill most types of household mold when applied directly.
- Hydrogen Peroxide (3% Solution): This is another safe alternative that penetrates porous surfaces while effectively addressing root-level contamination.
- Professional Remediation Services: For widespread issues or stubborn infestations, hiring certified professionals ensures proper removal using advanced tools and techniques that target both visible and hidden colonies.
Steps for Effective Mold Remediation
| Aspect | Using Bleach | Professional Remediation |
| Surface Penetration | Limited | Deep penetration into materials |
| Risk of Recurrence | High | Low |
| Addressing Root Cause | No | Yes |
| Health Risks | Potentially harmful fumes | Proper safety measures taken |
Preventing Common Mold Issues
To minimize the risk of needing remediation altogether: – Fix leaks promptly (e.g., plumbing or roof).
– Ensure proper ventilation in humid areas such as bathrooms and kitchens. – Use dehumidifiers in rooms with consistently high moisture levels. – Regularly inspect hidden or less-visible areas like basements and attics for early signs of water damage or discoloration.
By avoiding reliance on ineffective solutions like bleach and instead opting for proven alternatives or professional help where necessary, you’ll protect your home’s structure while safeguarding your family’s health from persistent mold problems.
- The Importance of Prompt Mold Removal Deltona FL to Protect Your Home
- Mold Removal Deltona FL: How to Spot It After Water Damage and Prevent Future Issues
- Mold Removal Deltona FL: Understanding the Difference Between Abatement and Remediation
- What to Expect During Mold Remediation in Deltona FL and How Much It Costs
- Effective Mold Remediation Deltona FL: 3 Signs of Black Mold and How to Remove It
- Essential Tips for Mold Inspection Deltona FL: How to Spot Black Mold and Expert Tips for Mold Removal Deltona FL
- How to Determine If You Need Mold Removal Deltona FL Services
- Understanding Mold Remediation Deltona FL: Key Differences from Mold Removal
- Understanding Mold Removal Deltona FL: Costs and Key Factors to Consider
Mold Removal Deltona FL: How to Spot It After Water Damage and Prevent Future Issues

Mold growth is a common issue after water damage, and it can lead to long-term problems if not addressed promptly. Understanding how to spot mold and take preventative measures is essential for maintaining a safe and healthy environment in your home. Here’s how you can identify mold after water damage and protect your property from future infestations.
Common Signs of Mold After Water Damage
- Visible Growth: Mold often appears as black, green, or gray patches on surfaces like walls, ceilings, or floors.
- Musty Odors: A persistent damp or musty smell is often a sign of hidden mold growth.
- Discoloration: Water-stained areas may develop dark spots over time as mold begins to grow.
- Health Symptoms: Allergic reactions such as sneezing, coughing, skin irritation, or respiratory issues may indicate the presence of mold in your home.
- Warped Materials: Wood flooring or drywall that becomes warped or swollen might be harboring hidden mold colonies.
Steps to Spot Hidden Mold
- Inspect High-Risk Areas: Focus on basements, attics, under sinks, behind appliances (like dishwashers), and inside HVAC systems where moisture tends to accumulate.
- Check for Moisture Traps: Use a moisture meter to identify damp walls or floors that might support mold growth beneath the surface.
- Use Flashlights and Mirrors: Shine light into dark corners or behind furniture to uncover potential problem spots.
- Look Behind Wallpaper/Paneling: Peeling wallpaper or loose paneling could indicate moisture trapped underneath with possible hidden mold.
- Consult Air Quality Monitors: Elevated humidity levels indoors (above 60%) may signal conditions conducive to unseen fungal growth.
How To Prevent Future Mold Issues
- Address Moisture Promptly: Fix leaks and dry wet materials within 24–48 hours whenever possible.
- Maintain Indoor Humidity Levels Below 50%: Use dehumidifiers in damp environments like basements during high-humidity seasons.
- Ventilate Spaces Properly: Ensure bathrooms and kitchens are well ventilated through exhaust fans or open windows when cooking/showering.
- Seal Vulnerable Surfaces: Consider sealing porous materials with waterproof coatings if they are prone-to-wet-area exposure (e.g., bathroom tiles).
- Inspect Your Home Regularly: Schedule periodic checks for signs of leaks around plumbing fixtures/rooflines after heavy rains/storms.
| Prevention Action | Frequency | Tools Needed |
| Fix Plumbing Leaks | Immediately upon discovery | Wrenches/Professional Services |
| Use Dehumidifiers | Seasonally/as needed | Portable Room Dehumidifiers |
| Inspect Roof & Gutters | Twice yearly | Ladder/Safety Gear |
| Clean HVAC Systems | Annually | Professional HVAC Service |
Why Timely Action Matters
Unchecked mold growth not only damages structures but also poses significant health risks over time. Prolonged exposure may lead to respiratory problems such as asthma attacks or allergic reactions due its mycotoxin release into air spaces occupied by occupants/users alike . Furthermore delaying remediation increases extent-cost-complexity involved removing-contaminated-materials restoring-safe-living-environments . Staying vigilant post-water-crisis ensures peace-o-mind longevity property investments protects occupant wellbeing sustainably
Effective Mold Remediation Deltona FL: Protect Your Home from Hidden Mold
Mold growth can often go unnoticed until it becomes a significant problem. Hidden mold, in particular, can develop in unseen areas like behind walls, under carpeting, or inside air ducts. Identifying early indicators of hidden mold is essential to protect your home and maintain a healthy living environment. Below, we explore the common signs to watch for and steps you can take to safeguard your property.
Common Signs of Hidden Mold
- Musty Odors
Persistent, earthy smells in certain rooms or areas could signal hidden mold growth. Even if you cannot see mold, an unusual odor is often an early warning sign. - Water Stains and Discoloration
Yellowish or brown stains on ceilings or walls may point to water damage conducive to mold formation. Look closely for peeling paint or discoloration as well. - Warping Walls and Flooring
Moisture buildup caused by leaks or condensation may lead to warped walls, bubbling paint, or buckling floors—potentially hiding mold underneath. - Increased Allergy Symptoms
Mold spores can trigger allergic reactions such as coughing, sneezing, itchy eyes, and respiratory issues. If symptoms worsen at home but improve elsewhere, it’s worth investigating for potential hidden mold. - Condensation Issues
Excessive condensation on windows or pipes creates a damp environment where mold thrives. Persistent moisture should be addressed promptly.
Areas Prone to Hidden Mold Growth
| Vulnerable Areas | Potential Causes |
| Bathrooms | Leaky fixtures, poor ventilation |
| Kitchens | Under sinks, behind appliances |
| Basements | Poor drainage, high humidity |
| HVAC Systems | Condensation within ducts |
| Attics | Roof leaks |
Regular inspections of these areas can help reduce the risk of undetected growth.
Steps to Protect Your Home from Hidden Mold
- Address Water Damage Immediately
Repair leaks in roofs, plumbing systems, and windows as soon as they occur. Dry affected areas thoroughly within 24–48 hours after water exposure. - Control Humidity Levels
Use dehumidifiers in damp spaces and ensure indoor humidity remains below 60%. Proper ventilation is also critical in bathrooms and kitchens. - Improve Air Circulation
Open windows regularly when weather permits and use fans for better air movement throughout your home. - Inspect Vulnerable Areas Regularly
Schedule routine inspections for basements, attics, HVAC systems, and other common problem spots prone to moisture buildup. - Use Mold-Resistant Materials
When renovating or repairing your home after water damage incidents, opt for materials designed to resist mold growth (e.g., mildew-resistant drywall).
By staying vigilant about these indicators and preventative steps outlined above you can significantly reduce risks associated with undetected growing molds ensuring safer healthier homes
Spot Early Signs of Black Mold Deltona FL and Safeguard Your Home
Detecting hidden mold early is crucial for maintaining a healthy living environment and preventing costly structural damage. Mold often develops in concealed spaces, making it difficult to identify until it spreads extensively. Below are some warning signs and tips that can help you spot hidden mold, along with measures to protect your home.
Common Signs of Hidden Mold
- Persistent Musty Odors: A damp, earthy smell indoors could indicate mold growing behind walls, under floorboards, or in other concealed areas.
- Unexplained Health Issues: Respiratory problems such as coughing, sneezing, or worsening asthma symptoms may be linked to mold exposure.
- Discoloration on Surfaces: Stains or discoloration on ceilings, walls, or floors could be a sign of moisture intrusion and potential mold growth beneath the surface.
- Peeling Paint or Wallpaper: Excess moisture behind painted walls can cause paint to bubble or peel, creating an environment conducive to mold growth.
- Warping Walls or Floors: Persistent dampness can cause wood and drywall to warp or buckle over time.
- Water Damage History: Homes with previous water damage incidents (e.g., from flooding or leaking appliances) are at higher risk for hidden mold development.
Key Areas Prone to Hidden Mold
| Location | Risk Factors |
| Bathrooms | High humidity from showers and baths |
| Attics | Poor ventilation combined with roof leaks |
| Basements | Dampness from groundwater seepage |
| Kitchens | Leaks around sinks, dishwashers, and refrigerators |
| HVAC Systems | Moisture buildup inside ducts |
How to Inspect for Hidden Mold
- Check for water stains near plumbing fixtures like sinks and tubs.
- Use a flashlight during inspections of poorly lit areas such as basements or crawlspaces.
- Tap gently on walls – hollow sounds may indicate moisture damage inside the drywall.
- Monitor air quality in rooms where musty odors persist.
Preventive Measures for a Mold-Free Home
- Control Indoor Humidity Levels: Keep humidity levels between 30%–50% using dehumidifiers if necessary.
- Fix Water Leaks Promptly: Repair leaking pipes, roofs, windows, or appliances as soon as possible.
- Ventilate Properly: Ensure adequate airflow in bathrooms and kitchens by using exhaust fans during use.
- Inspect Regularly: Perform routine checks in high-risk areas (e.g., basements) for signs of water intrusion or excessive dampness.
- Use Mold-resistant Materials: Opt for mildew-resistant paint when renovating moisture-prone rooms like bathrooms.
By addressing early indicators promptly and taking protective measures against future occurrences, homeowners can mitigate health risks while preserving their property value.
How to Know When You Need a Mold Inspection Deltona FL to Prevent Further Damage
Dealing with mold growth can be overwhelming, and understanding when to involve a professional is essential to safeguard both your property and health. While small areas of mold may sometimes be handled independently, there are circumstances where professional intervention is required. Below, we outline the scenarios where contacting a mold remediation expert becomes crucial.
1. Mold Covers Large Areas
According to the Environmental Protection Agency (EPA), if mold covers an area larger than 10 square feet, it’s time to call in professionals. Large-scale infestations often indicate a deeper issue, such as significant water damage or hidden moisture problems that need expert assessment and resolution.
2. Persistent Mold Growth
If you’ve attempted cleaning visible mold only for it to return repeatedly, it’s likely that the root cause hasn’t been addressed. Professionals have the equipment and expertise required to identify hidden sources of moisture—such as behind walls or under flooring—and eliminate mold at its source.
3. Musty Odors Without Visible Mold
A persistent musty smell in your home is a strong indicator of hidden mold growth. Mold can thrive in inaccessible areas like HVAC systems, wall cavities, or beneath carpets. Professionals use advanced tools such as infrared cameras and moisture meters to locate these concealed infestations.
4. Health Problems Among Occupants
Exposure to mold can cause symptoms like allergies, respiratory issues, skin irritation, or headaches—especially for individuals with asthma or compromised immune systems. If household members experience unexplained health problems that improve when they leave the house, it’s essential to consult a remediation specialist.
5. Water Damage History
Homes that have experienced flooding, burst pipes, roof leaks, or other forms of water damage are at high risk for mold development—even months after the initial event. A professional inspection will ensure all affected areas are thoroughly dried and treated to prevent future outbreaks.
6. Structural Damage Signs
Over time, unchecked mold growth can weaken structural elements like wooden beams and drywall by breaking them down at a cellular level. Signs such as soft floors or warped walls indicate advanced damage that requires immediate attention from specialists trained in both remediation and repair.
The Benefits of Hiring a Professional for Mold Testing Deltona FL
- Accurate Assessment: Professionals evaluate both visible and hidden contamination using specialized tools.
- Thorough Cleaning: They utilize industrial-grade equipment and techniques like HEPA filtration.
- Prevention Strategies: Experts identify the underlying causes (e.g., ventilation issues) and recommend solutions.
- Safety Measures: Proper containment prevents spore spread during removal.
| Service Provided | DIY Approach | Professional Help |
| Surface Cleaning | Limited | Comprehensive |
| Subsurface Contamination Detection | Not possible | Advanced equipment |
| Health Risk Mitigation | Limited effectiveness | High effectiveness |
Taking swift action by involving experts minimizes risks while ensuring long-term protection for your home or business environment against further damage caused by recurring mold issues.
How to Choose the Best Mold Removal Company Deltona FL to Prevent Further Damage
Mold is not just an eyesore; it poses significant risks to both your health and the structural integrity of your home. While minor mold growth can sometimes be addressed with DIY solutions, certain situations require the expertise of a professional mold remediation specialist. Knowing when to seek professional help is essential for preventing further damage and ensuring effective removal.
Signs You Need a Mold Remediation Professional
- Extensive Spread
If mold covers an area larger than 10 square feet, it’s beyond the scope of DIY cleanup. Large-scale infestations are more likely to penetrate surfaces like drywall or wood, necessitating specialized removal methods. - Recurrent Mold Growth
If you’ve removed mold in the past, only for it to come back repeatedly, this points to an underlying issue such as moisture intrusion or poor ventilation. Professionals can investigate the root cause and provide long-term solutions. - Mold in HVAC Systems
Mold growth within ductwork or HVAC systems can spread spores throughout your home every time the system operates. Cleaning such areas requires advanced equipment and techniques that only trained professionals possess. - Health Symptoms Among Occupants
Persistent respiratory issues, skin irritation, or allergic reactions in people exposed to your home may suggest significant hidden mold growth. Professionals use tools like infrared cameras and air quality testing equipment to locate concealed colonies.
Situations Requiring Immediate Action
| Situation | Why Professional Help is Critical |
| Water Damage | Lingering moisture after leaks or floods creates ideal conditions for rapid mold development (within 24–48 hours). Experts mitigate water damage alongside mold removal. |
| Structural Damage | When structural components such as beams or flooring are compromised due to prolonged mold exposure, professionals assess whether repairs or replacements are necessary during remediation efforts. |
| Toxic Mold Presence | Certain types of molds, such as Stachybotrys chartarum (black mold), release mycotoxins that pose serious health risks. Specialized containment and handling strategies are needed for safe removal. |
Benefits of Hiring a Professional
- Thorough Inspection – Trained specialists conduct comprehensive assessments using high-tech tools like moisture meters and thermal imaging cameras.
- Safe Containment – Professionals establish containment zones utilizing HEPA filters and negative air machines.
- Effective Removal Techniques – They employ industry-standard methods like dry ice blasting or antimicrobial treatments while ensuring minimal disruption.
- Prevention Strategies – Experts provide tailored advice on ventilation improvements, waterproofing solutions, and other preventive measures based on their findings.
Cost vs Risk Analysis
While professional services may seem expensive upfront, delaying intervention could lead to higher repair costs later on if untreated mold causes severe structural damage or widespread contamination.
By recognizing these signs early and acting promptly with expert assistance, you protect both your home’s value and its occupants’ well-being from long-term harm caused by unchecked mold outbreaks.
- The Importance of Prompt Mold Removal Deltona FL to Protect Your Home
- Mold Removal Deltona FL: How to Spot It After Water Damage and Prevent Future Issues
- Mold Removal Deltona FL: Understanding the Difference Between Abatement and Remediation
- What to Expect During Mold Remediation in Deltona FL and How Much It Costs
- Effective Mold Remediation Deltona FL: 3 Signs of Black Mold and How to Remove It
- Essential Tips for Mold Inspection Deltona FL: How to Spot Black Mold and Expert Tips for Mold Removal Deltona FL
- How to Determine If You Need Mold Removal Deltona FL Services
- Understanding Mold Remediation Deltona FL: Key Differences from Mold Removal
- Understanding Mold Removal Deltona FL: Costs and Key Factors to Consider
Mold Removal Deltona FL: Understanding the Difference Between Abatement and Remediation
When it comes to addressing mold problems in your home or property, two terms often come up: mold abatement and mold remediation. While they may seem interchangeable, these processes have distinct purposes and applications. Understanding their differences will help you choose the right solution for your specific situation.
What Is Mold Abatement?
- Identifying affected areas through testing or inspection.
- Applying specialized cleaning agents to kill surface mold.
- Removing contaminated materials, like drywall or carpeting, if necessary.
- Sealing off affected zones to prevent cross-contamination during cleanup.
The key goal of abatement is immediate reduction rather than targeting the root causes of mold growth—a crucial distinction from remediation.
What Is Mold Remediation?
Mold remediation takes a broader approach, aiming not only to remove existing mold but also to address the underlying factors that lead to its growth. Remediation involves identifying and tackling moisture issues—such as leaks or high humidity—that create an environment conducive for mold proliferation.
Key steps in remediation include:
1. Inspection and Assessment: Determining the extent of contamination using tools like moisture meters and air quality tests. 2. Source Control: Identifying water leaks, poor ventilation, or high humidity sources contributing to mold growth. 3. Containment Measures: Using barriers such as plastic sheeting and negative air pressure machines to isolate affected areas. 4. Mold Removal: Removing both visible surface molds and deeply embedded spores from materials like wood or concrete. 5. Moisture Management: Installing dehumidifiers or fixing water intrusions to prevent recurrence. 6. Restoration: Repairing damaged areas after successful treatment.
Remediation provides a long-term solution by addressing both existing mold colonies and environmental triggers.
Differences Between Abatement & Remediation
| Aspect | Mold Abatement | Mold Remediation |
| Primary Objective | Reduce existing levels of mold | Eliminate mold at its source |
| Scope | Focuses on immediate removal | Includes prevention measures |
| Addressing Root Cause | Does not tackle moisture issues | Fixes underlying factors (e.g., leaks) |
| Application | Temporary solution | Long-term effectiveness |
How To Choose Between Them
Choosing between abatement and remediation depends on several factors:
1. Severity of Infestation: For small-scale issues with no evident structural damage, abatement may suffice as a quick fix. 2. Root Cause Presence: If you notice persistent dampness, water damage, or recurring outbreaks after simple removal efforts, opt for full-scale remediation. 3. Health Concerns: Individuals with allergies or respiratory conditions should consider remediation for better indoor air quality.
By understanding each method’s purpose, you can ensure a safer living environment while mitigating future risks efficiently.
Step-by-Step Guide to Mold Remediation Deltona FL for Effective Mold Removal
Understanding the mold abatement process is crucial for ensuring that mold is effectively removed from your property while preventing its recurrence. Mold abatement focuses on containing and removing mold infestations to create a safer and healthier environment. Below is a detailed, step-by-step guide to help you understand how professionals approach this process.
Step 1: Inspection and Assessment
The first step in mold abatement involves a thorough inspection of the property. This phase helps identify:
– The location of the mold growth: Visible mold often indicates moisture problems in hidden areas like walls, ceilings, or HVAC systems.
– The type and extent of the infestation: Professionals may test air samples or surfaces to determine the species of mold and how far it has spread.
Key tools used in this stage include moisture meters, thermal imaging cameras, and borescopes for detecting hidden moisture sources.
Step 2: Containment of Affected Areas
To prevent cross-contamination, the affected area is sealed off using industry-grade containment measures such as:
– Plastic sheeting with zipper doors to separate contaminated areas from unaffected parts of the property.
– Negative air pressure systems to ensure that airborne spores do not escape into clean zones.
This step is critical in minimizing health risks and protecting other areas of your home or business.
Step 3: Air Filtration
Mold spores can easily travel through air circulation systems, making proper filtration a vital component of abatement. High-Efficiency Particulate Air (HEPA) filters are used in air scrubbers or vacuums to remove airborne particles, including spores and other allergens.
Benefits include: – Improved indoor air quality. – Reduced risk of respiratory issues caused by airborne contaminants.
| Equipment Used | Function |
| HEPA Filters | Captures 99.97% of particles larger than 0.3 microns |
| Air Scrubbers | Cleans air during remediation |
Step 4: Removal of Damaged Materials
Porous materials like drywall, carpeting, insulation, or wood affected by severe mold growth are typically removed because they cannot be salvaged effectively without risking continued contamination. This process includes:
1. Disposal using sealable bags to prevent spore dispersion during transit. 2. Sanitization of surrounding surfaces with EPA-approved antimicrobial solutions.
Non-porous surfaces like metal or glass are cleaned thoroughly using specialized cleaning agents.
Step 5: Cleaning and Decontamination
Once damaged materials are removed, all remaining surfaces are cleaned using industry-grade techniques such as dry ice blasting or damp wiping with fungicides and biocides.
Focus areas include: – HVAC systems (if impacted). – Hard-to-reach corners where spores could linger. – Furniture and personal belongings if they can be restored safely.
Step 6: Addressing Moisture Issues
Moisture control is at the core of effective mold abatement because it eliminates the conditions necessary for future growth. Professionals will identify sources like leaks or high humidity levels and recommend steps such as: – Sealing water leaks. – Improving ventilation. – Using dehumidifiers to maintain optimal indoor humidity levels (below 60%).
By addressing these concerns proactively, you reduce the risk of recurrence significantly.
Step 7: Verification After Abatement
Finally, after completing abatement tasks: 1. Post-abatement testing ensures successful remediation by measuring spore counts in treated areas compared with baseline levels from unaffected spaces. 2. Visual inspections confirm no visible traces remain on surfaces or furnishings.
This critical step guarantees that your space has been restored to safe conditions before re-entry.
Effective mold abatement requires meticulous planning and execution at each stage to ensure safety while handling hazardous materials like toxic molds (e.g., Stachybotrys chartarum). Understanding this process helps property owners make informed decisions when dealing with mold infestations in any environment.
Effective Black Mold Removal Explained Step by Step in Deltona, FL
Mold abatement refers to the process of eliminating mold and preventing its future growth through comprehensive cleaning, removal, and treatment techniques. This systematic approach is crucial for ensuring a safe and healthy environment, especially when dealing with significant or hazardous mold infestations. Below is a detailed step-by-step explanation of the mold abatement process to help you understand how professionals tackle mold issues effectively.
Step 1: Assessing the Mold Problem
- Inspecting visible areas: Identifying where mold colonies are growing.
- Testing air quality: Detecting spores that may not be immediately noticeable.
- Analyzing moisture levels: Identifying sources of water intrusion or excess humidity that contribute to mold growth.
This phase helps to determine the scope of the problem and guides the development of an appropriate action plan.
Step 2: Containment Measures
- Sealing off rooms with plastic sheeting.
- Using negative air pressure machines to isolate airflow from contaminated areas.
- Restricting access to affected spaces until remediation work is complete.
Proper containment ensures that no cross-contamination occurs during removal efforts.
Step 3: Air Filtration
- High-Efficiency Particulate Air (HEPA) filters are used in air scrubbers and vacuums to trap microscopic particles.
- Ventilation systems may also be sealed or filtered temporarily to ensure that spores do not enter HVAC ducts.
This step improves indoor air quality and reduces health risks associated with inhaling airborne spores.
Step 4: Removing Contaminated Materials
- Identifying irreparable items: Evaluating what materials cannot be salvaged due to extensive damage.
- Safe disposal: Bagging contaminated items securely in heavy-duty plastic bags for safe removal from the property.
Non-porous surfaces (such as metal or glass) can often be cleaned and disinfected instead of being removed entirely.
Step 5: Cleaning and Disinfecting Surfaces
- Scrubbing walls, floors, and non-removable fixtures with antimicrobial solutions.
- Using HEPA vacuuming on remaining debris after cleanup.
The goal here is both immediate cleaning and long-term prevention against regrowth by killing any remaining spores effectively.
Step 6: Addressing Moisture Issues
- Repairing water leaks in plumbing systems or roofs.
- Dehumidifying rooms using industrial-grade dehumidifiers.
A property’s humidity level should ideally remain below 50% after mitigation efforts are complete.
Step 7: Final Inspection
- Additional cleaning might take place if residual contamination exists.
Once cleared, safety protocols may lift accordingly allowing normal use/residential occupancy again under safer conditions compared earlier risks identified during initial evaluations above earlier documented phases outlined prior .
Comprehensive Guide to Mold Inspection Deltona FL: Eliminating Mold Effectively
Mold remediation is an essential process designed to effectively eliminate mold growth from affected areas and prevent future occurrences. It involves a systematic approach that not only removes visible mold but also addresses the underlying causes, ensuring a safe and healthy living or working environment. Below, we’ll explore the key components of the mold remediation process in detail.
Assessment and Inspection
- Mold Type Identification: Samples may be taken for laboratory analysis to identify the specific type(s) of mold present.
- Source Analysis: The root causes of moisture problems—such as leaks, humidity, or poor ventilation—are located.
- Developing a Plan: Based on findings, a detailed remediation plan is developed outlining steps and safety measures.
Containment of Affected Areas
- Setting up physical barriers, such as plastic sheeting.
- Using negative air pressure systems with HEPA filters to isolate contaminated areas.
- Restricting access to unaffected parts of the property by sealing doors and windows.
Effective containment minimizes secondary contamination risks in other parts of the building.
Air Filtration Systems
- Improved Air Quality: Removes harmful particles from indoor air.
- Prevents Recontamination: Keeps spores contained within sealed-off areas.
A combination of negative air machines and portable HEPA vacuums ensures thorough filtration throughout the process.
Mold Removal and Disposal
| Material Type | Removal Approach |
| Porous (e.g., drywall, carpet) | May require removal or complete replacement |
| Non-Porous (e.g., metal, glass) | Cleaned using EPA-approved fungicides or biocides |
All contaminated materials removed from the site are double-bagged in polyethylene bags for safe disposal at an appropriate facility.
Addressing Moisture Problems
- Repairing leaks in plumbing or roofing systems promptly.
- Improving ventilation through exhaust fans or dehumidifiers.
- Ensuring proper drainage around the building’s foundation.
By addressing these issues at their source, you reduce the likelihood of recurring mold problems while improving indoor conditions overall.
Restoration and Prevention Measures
- Replacing damaged materials (e.g., drywall or flooring).
- Applying anti-microbial sealants to treated surfaces as a protective layer.
- Educating property owners about maintaining proper humidity levels (ideally below 60%).
By taking proactive measures post-remediation, your property remains resilient against future infestations—ensuring peace of mind over time.
This comprehensive approach ensures that not only is existing mold effectively removed but efforts are made toward creating an environment where new growth cannot thrive again.
How to Determine If You Need Mold Testing Deltona FL or Mold Remediation for Your Property
Mold growth in your property can lead to serious structural damage and health risks if left unaddressed. Choosing between mold abatement and mold remediation depends on the extent of the problem, the type of mold present, and your long-term goals for maintaining a healthy indoor environment. This section will help you understand when to opt for each approach, ensuring you make an informed decision.
Understanding Mold Abatement vs. Mold Remediation
- Mold Abatement: Refers specifically to reducing or removing mold levels in a controlled area without necessarily addressing its root cause. It focuses on containment and removal but may not include preventive measures.
- Mold Remediation: A more comprehensive approach that not only removes existing mold but also identifies and corrects the underlying causes (e.g., moisture issues) to prevent future growth.
Both methods have their advantages depending on the severity of your mold problem.
When Should You Choose Mold Abatement?
- If the affected area is under 10 square feet (e.g., bathroom ceilings or small wall sections).
- The scope of contamination is limited and does not pose widespread concern.
- You need quick containment due to time constraints (e.g., moving out or pre-renovation work).
- When costs are a concern, abatement often acts as a cost-effective short-term solution.
When Should You Opt for Mold Remediation?
- Affected areas exceed 10 square feet or involve multiple rooms.
- Airborne spores have spread throughout HVAC systems.
- Family members experience frequent allergic reactions, respiratory issues, or other symptoms linked to toxic molds like Stachybotrys chartarum (black mold).
- Visible signs of wood rot, drywall crumbling, or water-damaged materials due to prolonged exposure.
- Persistent leaks, high humidity levels (>60%), or poor ventilation contribute continuously to mold proliferation.
- You aim for a comprehensive approach that addresses root causes such as plumbing repairs, waterproofing basements, and installing proper ventilation systems.
Table: Quick Comparison Between Mold Abatement and Remediation
| Criteria | Mold Abatement | Mold Remediation |
| Focus | Immediate reduction/removal | Long-term solution |
| Addresses Root Cause | No | Yes |
| Coverage Area | Small-scale contamination | Large-scale/recurring problems |
| Cost | Lower | Higher due to comprehensive steps |
| Techniques Used | Containment & surface cleaning | Removal + source mitigation |
Key Questions To Ask Before Making Your Decision
- How extensive is the current mold issue?
- Is there visible damage that requires deeper repairs?
- Are any household members experiencing health issues potentially related to mold exposure?
- What budgetary constraints do I need to consider?
- Am I looking for short-term control or long-term prevention?
By assessing these factors and consulting with professionals specializing in both approaches, you can confidently decide whether mold abatement or remediation is appropriate for your specific situation while protecting your property’s integrity and ensuring occupant safety.
How a Mold Removal Company Deltona FL Ensures Proper Containment and Air Filtration
Mold removal is a complex process that requires careful management to ensure effective and safe results. Two critical components of this process are mold containment and air filtration. These steps not only prevent further contamination but also safeguard the health of individuals in the affected space. Below we explore why containment and air filtration are essential elements in the mold removal process.
Importance of Mold Containment
Mold spores are microscopic particles that can easily become airborne during disturbance, such as cleaning or demolition activities. Without proper containment, these spores can spread throughout your property, creating secondary contamination zones and exacerbating the issue.
- Preventing Cross-Contamination: Containment barriers ensure that mold spores remain confined to the affected area, preventing them from spreading to clean zones.
- Protecting Occupants: By isolating the contaminated areas, you reduce potential exposure to harmful mold particles for occupants and workers.
- Streamlining Cleanup Efforts: Localizing the affected zone simplifies cleanup procedures and allows for more efficient remediation efforts.
| Type of Containment | Description |
| Source Containment | Directly sealing off specific areas or materials where mold is concentrated. |
| Full Containment | Enclosing larger spaces with plastic sheeting and tape to restrict airflow. |
| Critical Barriers | Installing temporary barriers like zip walls or negative air chambers. |
Role of Air Filtration in Mold Removal
Airborne mold spores pose significant risks to indoor air quality (IAQ) during remediation efforts. High-efficiency particulate air (HEPA) filtration systems play an integral role in mitigating these risks by capturing microscopic particles from the ambient environment effectively.
- Improved Indoor Air Quality
HEPA filters can trap up to 99.97% of particles down to 0.3 microns, including mold spores, dust, and other allergens. - Creating Negative Pressure Environments
Air scrubbers equipped with HEPA filters can create negative pressure within a contained space, ensuring airborne contaminants do not escape into surrounding areas. - Worker Protection
Proper air filtration minimizes occupational exposure for workers handling contaminated materials.
| Equipment Type | Purpose |
| Air Scrubbers/ Purifiers | Filters large volumes of contaminated air |
| HEPA Vacuums | Removes surface-level particulates |
| Negative Air Machines | Maintains controlled airflow for safety |
Best Practices for Successful Mold Containment & Filtration
- Install floor-to-ceiling plastic sheeting around contaminated areas using airtight seals.
- Use double layers or overlapping sheets at entry points along with zippered openings for worker access.
- Continuously operate HEPA-filtered machines until all visible signs of contamination have been removed.
- Conduct post-removal testing or inspection before dismantling barriers or deactivating equipment.
Incorporating both containment measures and advanced air filtration technologies ensures thorough remediation while significantly reducing health-related hazards associated with airborne pollutants like molds. They represent two essential pillars supporting successful long-term outcomes during any professional abatement project aimed at restoring safe living conditions indoors effectively without disruptions caused through improper handling/ short-cut approaches
FAQs About Mold Abatement and Remediation: Addressing Common Concerns
Mold growth is a common yet potentially hazardous issue for property owners. Understanding mold abatement and remediation is crucial in effectively tackling the problem. Below are frequently asked questions about these processes to help you make informed decisions.
What is the Difference Between Mold Abatement and Mold Remediation?
- Mold Abatement: Focuses on reducing mold levels to safe thresholds as defined by environmental or regulatory standards. This process often involves cleaning and removing mold from affected surfaces.
- Mold Remediation: A more comprehensive approach that identifies the source of moisture feeding the mold, removes existing colonies, repairs affected areas, and ensures conditions are unfavorable for future growth.
Both are effective solutions depending on the severity of the infestation, but remediation tends to address root causes more thoroughly.
How Do I Know if I Need Mold Removal Services?
You should consider professional mold removal services if:
– You notice visible signs of mold (e.g., black or green spots).
– There is a persistent musty odor in certain areas of your property.
– Individuals in your household experience unexplained respiratory issues or allergic reactions.
– Water damage has recently occurred, as this creates ideal conditions for mold development.
A professional inspection can determine whether abatement or remediation is necessary based on your specific situation.
What Health Risks Are Associated with Mold Exposure?
Exposure to mold can lead to various health problems, depending on individual sensitivities and exposure levels:
– Allergic reactions such as sneezing, runny nose, or skin irritation.
– Respiratory issues, including asthma attacks or difficulty breathing.
– Chronic fatigue or headaches in individuals exposed for prolonged periods.
Those with compromised immune systems, young children, and older adults may be at a higher risk of severe symptoms.
Can I Handle Mold Removal on My Own?
DIY methods can sometimes address minor surface-level infestations using household cleaners like vinegar or baking soda; however:
1. Extent of Growth Matters: If the affected area exceeds 10 square feet, professional assistance is recommended according to EPA guidelines.
2. Safety Risks: Without proper protective gear (e.g., gloves, respirators), DIY efforts may expose you to harmful spores during cleanup activities. 3. Underlying Moisture Issues: Professionals use advanced tools like infrared cameras and moisture meters to identify hidden sources of water that foster mold growth.
For extensive infestations or recurring issues, consulting experts ensures effective long-term results.
What Does a Professional Mold Remediation Process Involve?
| Step | Description |
| Inspection/Assessment | A detailed evaluation identifies contaminated areas and measures moisture levels. |
| Containment | Barriers (plastic sheeting) and negative air pressure limit spore spread during cleanup. |
| Air Filtration | HEPA filters remove airborne spores while improving indoor air quality. |
| Removal | Technicians safely remove damaged materials like drywall or carpeting as needed. |
| Cleaning/Disinfection | Nonporous surfaces are thoroughly cleaned with antimicrobial products that kill spores effectively. |
| Repairs & Prevention | The source of moisture is resolved along with repairs to prevent recurrence. |
This structured approach ensures that both visible molds and microscopic spores are addressed comprehensively.
How Long Does the Process Take?
The duration depends on several factors such as:
– The size of the affected area. – Severity of contamination. – Extent of structural damage requiring repair work.
For small-scale issues, services might take a day or two; larger-scale remediation projects could extend over several days.
By understanding these frequently asked questions about mold abatement and remediation processes, property owners can take proactive steps toward maintaining healthier environments free from harmful molds while preventing future outbreaks effectively.
- The Importance of Prompt Mold Removal Deltona FL to Protect Your Home
- Mold Removal Deltona FL: How to Spot It After Water Damage and Prevent Future Issues
- Mold Removal Deltona FL: Understanding the Difference Between Abatement and Remediation
- What to Expect During Mold Remediation in Deltona FL and How Much It Costs
- Effective Mold Remediation Deltona FL: 3 Signs of Black Mold and How to Remove It
- Essential Tips for Mold Inspection Deltona FL: How to Spot Black Mold and Expert Tips for Mold Removal Deltona FL
- How to Determine If You Need Mold Removal Deltona FL Services
- Understanding Mold Remediation Deltona FL: Key Differences from Mold Removal
- Understanding Mold Removal Deltona FL: Costs and Key Factors to Consider
What to Expect During Mold Remediation in Deltona FL and How Much It Costs

Mold remediation is an essential process for maintaining a safe and healthy living environment, especially when mold growth becomes significant. Understanding the costs involved and what to expect during the remediation process can help homeowners make informed decisions.
Factors Influencing Mold Remediation Costs
- Size of the Affected Area: Larger areas of mold contamination naturally require more labor and resources, leading to higher costs.
- Type of Mold: Certain types of molds, such as black mold (Stachybotrys), require specialized handling, which can increase overall expenses.
- Extent of Damage: If mold has infiltrated porous materials like drywall or flooring, these may need to be replaced, contributing to additional costs.
- Location in Home: Hard-to-reach areas like crawlspaces or attics may require more effort and specialized equipment, raising the price.
- Professional vs. DIY Approach: While DIY methods may save money upfront, professional services are often necessary for severe cases and come at a premium.
Average Cost Breakdown
| Service Type | Approximate Cost Range | Notes |
| Small Contaminated Area | $500 – $1,500 | Covers spaces under 10 square feet |
| Medium-Sized Areas | $1,500 – $3,000 | 10–50 square feet; typically includes drywall repair |
| Large Remediation Projects | $3,000 – $6,000 or more | Over 50 square feet; includes structural repairs if needed |
What to Expect During the Process
- A professional mold inspector evaluates your property for visible signs of mold.
- Moisture meters or infrared cameras may be used to locate hidden growth.
- The affected area is sealed off using plastic sheeting or other barriers.
- Negative air pressure systems are often deployed to prevent spores from spreading.
- Porous materials like carpets or drywall that cannot be salvaged are removed safely.
- Nonporous surfaces are cleaned using antimicrobial treatments.
- Air scrubbers equipped with HEPA filters are employed to remove airborne particles.
- After remediation is complete, damaged areas may need rebuilding or repainting.
- Professionals ensure the space is dry before repairs begin.
Additional Costs to Consider
- Mold Testing ($200-$600): Optional but recommended for pre- or post-remediation verification.
- HVAC Cleaning ($300-$800): Necessary if mold has spread into ductwork.
- Preventive Measures ($100-$500): Installation of dehumidifiers or improved ventilation can reduce future risks.
Investing in professional remediation ensures long-term safety while minimizing health hazards associated with prolonged exposure to mold.
Exploring the Costs of Mold Removal Deltona FL Per Square Foot
When it comes to mold remediation, understanding the cost is a critical step in planning the process. One of the most common methods used to estimate the price of mold removal is by calculating costs on a per-square-foot basis. This method ensures homeowners have a clear understanding of what they might expect depending on the size and scope of their mold problem. Below, we break down key factors influencing costs and provide insights into typical price ranges.
Understanding the Costs of Removing Black Mold Deltona FL
Several variables impact how much you will ultimately pay for mold remediation.
- Extent of Mold Growth: The larger the affected area, the higher the cost per square foot due to increased labor and materials required.
- Type of Mold: Toxic molds, such as black mold (Stachybotrys chartarum), often require more specialized equipment and containment measures, increasing overall expenses.
- Location: The accessibility of the affected area plays a role.
- Crawl spaces and attics are harder to reach and may cost more.
- Visible areas like walls or ceilings are easier to treat, leading to lower costs.
- Severity of Contamination: Minor surface-level mold problems can be less expensive compared to deep-seated infestations that require structural repairs or replacements.
- Custom Requirements: Specific remediation needs like air quality tests, post-remediation inspections, or HEPA vacuuming may add extra charges.
Per Square Foot Costs for Mold Inspection Deltona FL
On average, mold removal costs range between $10 to $30 per square foot, depending on severity and environmental factors.
| Type of Area | Estimated Cost per Square Foot | Additional Notes |
| Surface-Level Wall Mold | $10 – $15 | Easier removal with minimal structural damage |
| Attic or Crawl Space Mold | $15 – $25 | Hard-to-reach areas requiring specialized tools |
| Black Mold Remediation | $20 – $30+ | Toxicity increases safety precautions & expense |
| Severe Structural Damage | $25+ | May require demolition or reconstruction |
Additional Cost Considerations for Mold Testing Deltona FL
- Initial Inspection Fees: Professional inspections can range from $200 to $600 depending on property size.
- Air Quality Testing: If airborne spores are suspected, testing may cost an additional $150–$300.
- Post-Treatment Verification: Ensuring successful remediation through third-party verification can add approximately $100–$200.
Affordable Solutions from a Mold Removal Company in Deltona FL
- Address mold issues early before they worsen.
- Properly ventilate spaces prone to moisture buildup (e. g. , bathrooms or basements).
- Use dehumidifiers in humid climates to prevent future growth.
By closely monitoring these variables and working with professionals experienced in accurate estimates, you can better prepare for this necessary process while keeping your budget on track.
Common Spaces Affected by Mold Growth and How to Address Them
Mold can grow in various parts of a home, often thriving in areas with high humidity, poor ventilation, or water damage. Understanding the most common spaces affected by mold growth is essential for prevention and remediation. Below, we’ll delve into these spaces and provide actionable strategies for addressing mold issues effectively.
Why Bathrooms Are at Risk:
Bathrooms are one of the most common spaces for mold growth due to frequent exposure to moisture from showers, baths, and sinks. Poor ventilation or inadequate exhaust fans often exacerbate the problem.
How to Address Bathroom Mold:
– Improve Ventilation:Install or upgrade an exhaust fan to reduce moisture levels.Fix Leaks Promptly:Repair any leaking pipes, faucets, or showerheads.Use Mold-Resistant Materials:Opt for mold-resistant paint or grout when renovating your bathroom. – Regularly clean tiles and grout with a mixture of water and vinegar or baking soda.
Why Kitchens Are at Risk:
Kitchens can become breeding grounds for mold because of steam from cooking, leaky sinks or dishwashers, and food waste disposal areas.
How to Address Kitchen Mold:
– Check under sinks regularly for leaks or standing water. – Store food properly and clean out expired items from the refrigerator. – Wipe down surfaces after cooking to prevent moisture buildup. – Use a dehumidifier if your kitchen tends to stay humid.
Why Basements Are at Risk:
Basements are prone to mold growth due to their location below ground level. They often have higher humidity levels, potential flooding issues, or improper insulation.
How to Address Basement Mold:
| Common Issue | Solution | |—————————|———————————————-| | High Humidity | Use a dehumidifier consistently. | | Leaky Foundations | Seal cracks in walls or floors with epoxy. | | Stored Items | Avoid storing cardboard boxes; use plastic bins instead.
Additionally, ensure that gutters are diverting rainwater away from your home’s foundation.
Why Attics Are at Risk:
Poor insulation and inadequate ventilation in attics can trap warm air during winter months, leading to condensation that fosters mold growth.
How to Address Attic Mold:
– Install proper attic ventilation systems such as ridge vents or soffit vents. – Ensure insulation is evenly distributed throughout the attic space. – Inspect roofs regularly for leaks that could allow water intrusion. – Remove stored items that block airflow within the attic space.
Why HVAC Systems Are at Risk:
Heating and cooling systems can circulate spores throughout your home if mold develops within ducts or filters due to condensation buildup.
How to Address HVAC Mold:
1. Replace air filters regularly (every 1–3 months). 2. Clean ducts professionally every few years. 3. Inspect drip pans for standing water and clear out any clogs promptly. 4. Ensure ductwork is well-sealed against external contaminants.
Proactive Steps for All Areas
- Maintain indoor humidity levels between 30–50%.
- Regularly inspect areas prone to leaks (e. g. , plumbing under sinks).
- Dry wet areas within 24–48 hours after spills or flooding events occur.
By staying proactive with maintenance and addressing high-risk spaces promptly, homeowners can mitigate long-term damage caused by untreated mold infestations while maintaining a healthy living environment overall.
Detailed Insights into the Mold Abatement Timeline for Your Home
Mold abatement is a critical process to ensure the safety and health of your home. Understanding the timeline can help you plan effectively and reduce stress during this important procedure. The duration of mold remediation depends on factors such as the severity of the infestation, the size of the affected area, and whether professional services are involved. Below is a breakdown of what to expect when addressing mold in your home.
1.Assessment and Inspection (1-3 Days)
The first step involves identifying the extent of mold growth.
– The size of your property.
– Access to affected areas (e. g. , basements, crawlspaces).
– The need for testing samples in a lab for detailed analysis.
A professional inspector will also identify moisture sources that contribute to mold growth, such as leaks or high humidity levels.
2.Preparation for Mold Removal (1 Day)
Once mold has been identified, preparing the area is essential to minimize contamination:
– Setting up containment zones with plastic sheeting and negative air pressure systems (to prevent spores from spreading).
– Removing furniture, fabrics, or personal items from affected areas for cleaning or disposal.
– Ensuring proper protective equipment (PPE), such as gloves, masks, and suits, is available for workers or homeowners performing DIY abatement.
3.Mold Removal Process (1-7 Days Depending on Severity)
| Type of Mold Infestation | Estimated Timeframe | Example Areas |
| Small Surface Mold | 1 Day | Bathroom tiles, window sills |
| Moderate Growth | 2-4 Days | Walls, flooring under carpets |
| Severe Growth | 5-7 Days | HVAC systems, drywall replacement |
Removal techniques include:
– Scrubbing nonporous surfaces with antifungal cleaners. – Disposing of porous materials like drywall or carpeting that cannot be salvaged. – Using HEPA-vacuuming equipment to remove airborne spores post-cleanup.
4.Drying and Dehumidification (3-5 Days)
After removing visible mold growth, drying out affected areas is crucial:
– Industrial-grade dehumidifiers are used to lower moisture levels in walls, floors, or air. – Fans may also be installed strategically to improve airflow.
This phase ensures that hidden dampness does not lead to recurring mold issues.
5.Repair and Restoration (Varies Based on Damage)
If structural materials were removed during remediation—like drywall or insulation—restoration might be necessary:
– Minor repairs may take a few hours or days. – Larger-scale restorations involving entire walls or floors may extend this phase by several weeks.
Tips for Homeowners During Mold Abatement
To ensure smooth progress during this process:
1. Relocate temporarily if remediation affects large parts of your living space (especially if you have respiratory sensitivities).
2. Communicate regularly with contractors about project timelines and adjustments needed due to unforeseen damage. 3. Follow any post-remediation advice provided by professionals regarding ongoing moisture control measures.
Addressing a mold issue promptly while understanding its timeline helps maintain not only your home’s integrity but also its habitability over time.
Identifying and Removing Fabric Mold from Household Materials
Fabric mold is a common issue that can affect clothing, furniture upholstery, curtains, carpets, and other household materials. Mold thrives in damp, humid environments and can quickly spread on porous surfaces like fabric. Identifying and addressing fabric mold promptly is crucial to prevent damage to belongings and avoid potential health risks.
Signs of Mold on Fabrics
Detecting fabric mold early ensures easier removal.
- Visible Spots or Stains: Mold often appears as dark green, black, or white spots on fabrics.
- Musty Odor: A persistent musty smell may indicate hidden mold growth.
- Texture Changes: Affected fabrics may feel slimy or damp due to moisture retention.
- Deterioration of Material: Prolonged exposure to mold can weaken fibers and cause the fabric to decay.
Steps for Removing Fabric Mold
Tackling mold on fabrics requires careful attention to ensure effective cleaning without further spreading spores.
- Determine whether the item is salvageable. If the mold has caused severe structural damage or if the material cannot handle cleaning treatments (e. g. , delicate silk), consider discarding it.
- White Vinegar Solution: Mix 1 part vinegar with 3 parts water.
- Baking Soda Paste: Combine baking soda with water for spot treatments.
- Commercial Mold Cleaners: Ensure they are safe for fabrics by checking the label.
- Gently brush off loose spores outdoors using a soft-bristle brush to avoid spreading them indoors.
- Apply your chosen cleaning solution directly to the affected areas.
- Machine-wash washable fabrics using hot water (if safe for the material). Add half a cup of white vinegar during the rinse cycle for extra mold-fighting power.
- For non-machine washable items, hand wash them using soapy warm water mixed with vinegar.
- Dry items outdoors under direct sunlight when possible; UV rays help kill remaining spores.
- Avoid leaving damp fabrics indoors as this encourages further fungal growth.
Preventing Future Fabric Mold Growth
Prevention is key when it comes to avoiding recurring issues with fabric mold.
- Maintain indoor humidity levels below 50% using dehumidifiers or air conditioning units.
- Store clothing and textiles in dry locations away from moisture-prone areas like basements or attics.
- Wash and completely dry items immediately after exposure to water (e. g. , wet towels or damp clothes).
- Use silica gel packets or moisture absorbers in storage containers.
| Cleaning Solution | Effectiveness | Best Used For |
| White Vinegar | Highly Effective | General use on most fabrics |
| Baking Soda | Moderate | Spot treatment for small patches |
| Commercial Cleaners | Effective | Stubborn cases (check label suitability) |
When Professional Help Is Necessary
If fabric mold persists despite multiple cleaning attempts, it may be time to consult professionals who specialize in textile restoration and deep-cleaning services. This is especially important for valuable or antique items that require careful handling.
By promptly addressing fabric mold issues and taking preventive measures, you can protect your household materials while maintaining a healthy living environment free from harmful spores.
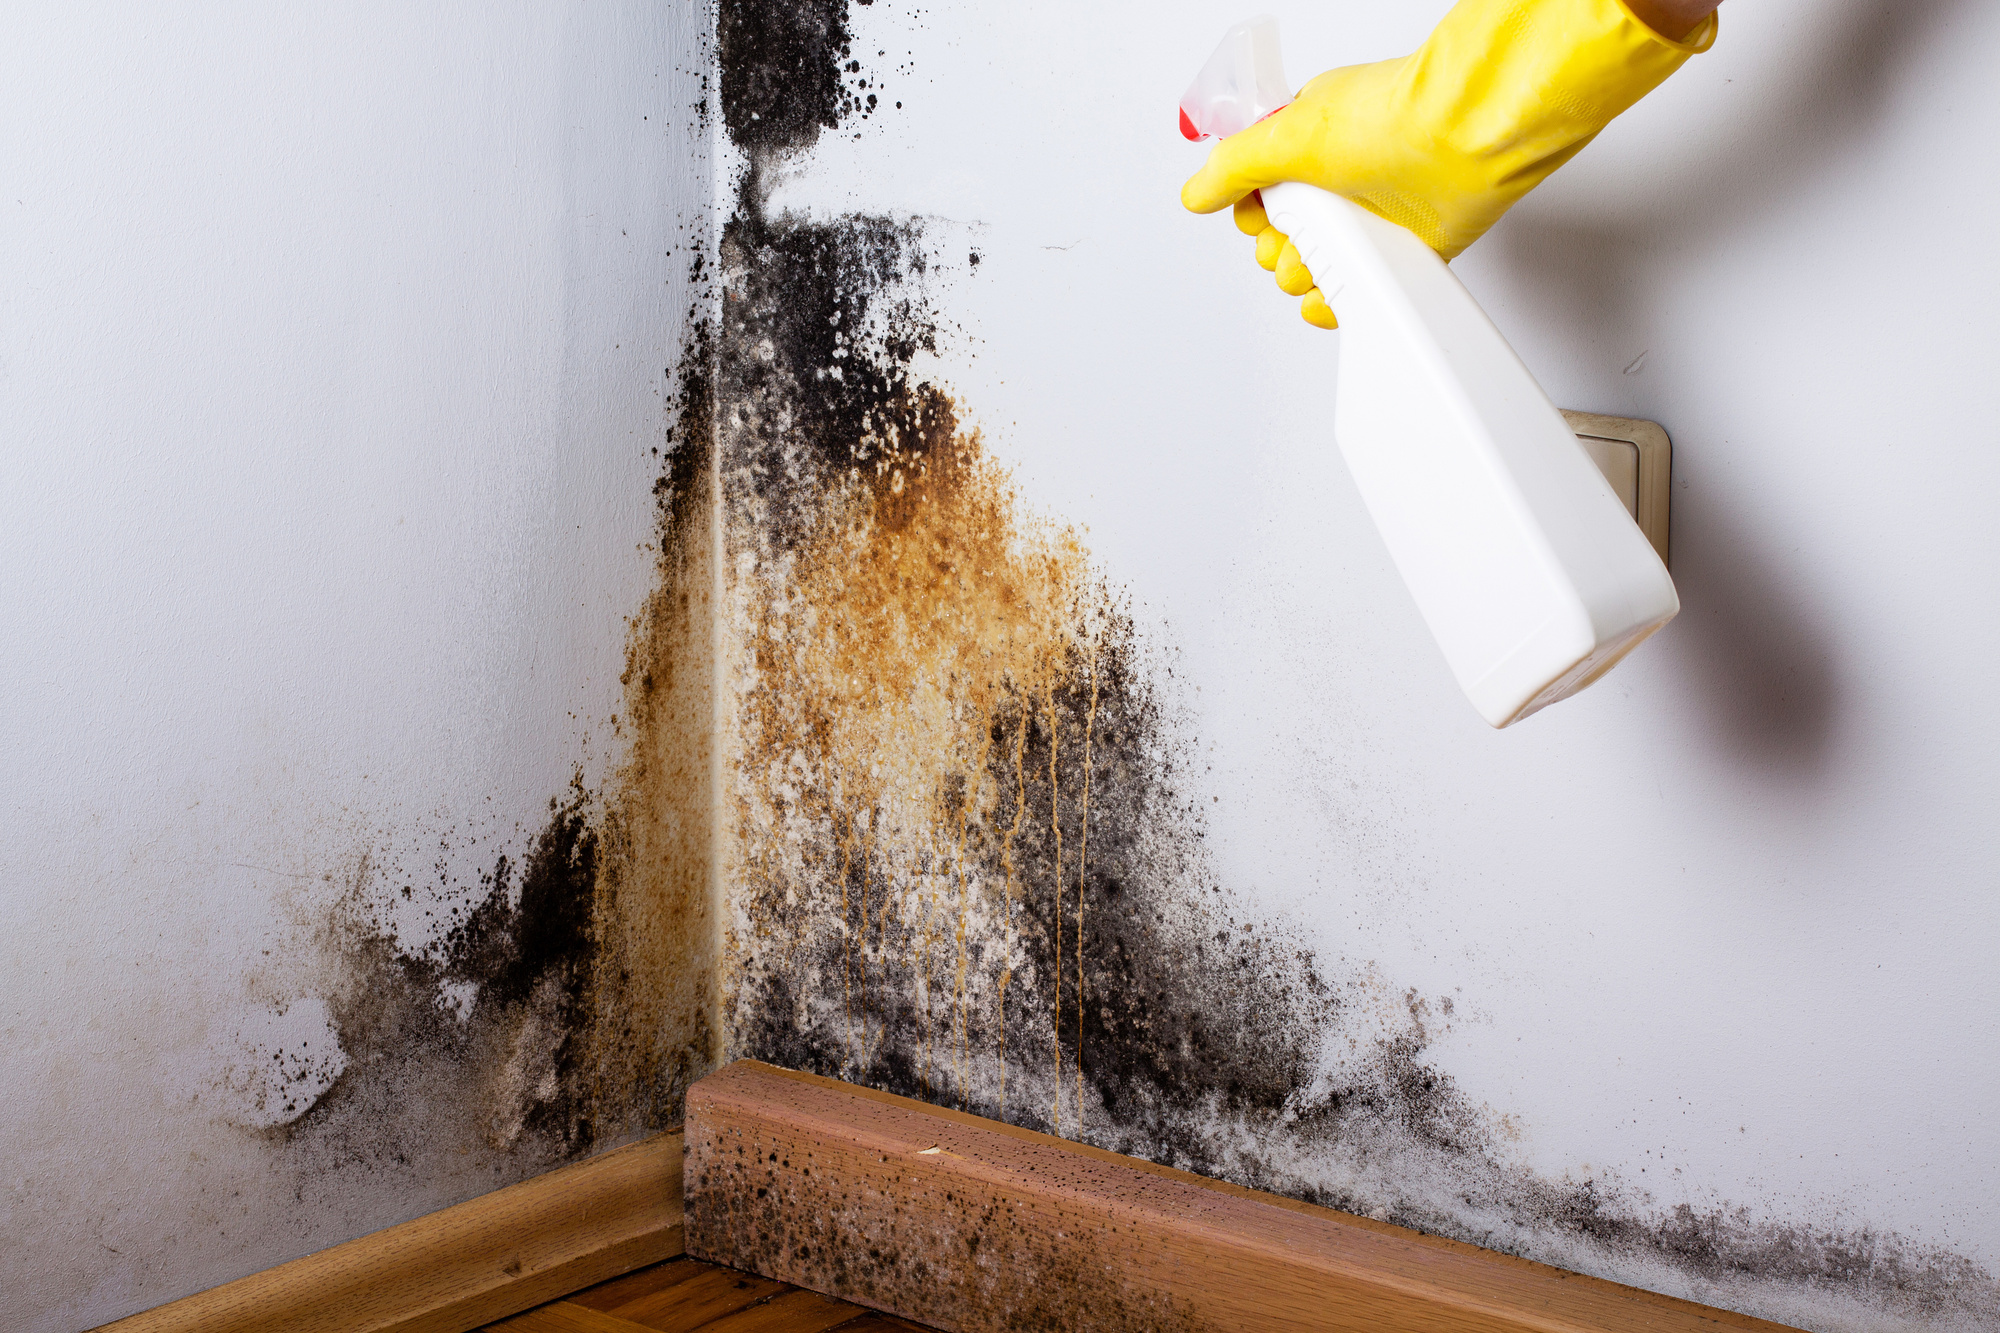
Recognizing and Addressing HVAC Mold to Improve Air Quality
Mold growth in HVAC (Heating, Ventilation, and Air Conditioning) systems is a serious concern for homeowners. Not only can it compromise the efficiency of the system, but it can also negatively affect indoor air quality, leading to potential health risks. Understanding how to recognize HVAC mold and addressing it promptly is essential for maintaining a healthy living environment.
Signs of Mold in Your HVAC System
Identifying mold in your HVAC system early on can help mitigate its spread.
- Musty Odors:A persistent musty smell when your HVAC system operates is often an indicator of mold.
- Visible Mold Growth:Mold may appear around vents, drip pans, or internal components like coils.
- Allergy Symptoms:Increased allergic reactions such as sneezing, coughing, or difficulty breathing when indoors could signal mold contamination.
- Humidity Issues:Excess moisture within or near your system can promote mold development.
Causes of Mold in HVAC Systems
- Excess Moisture:Condensation from cooling coils or improper drainage mechanisms is a leading cause.
- Poor Ventilation:Limited airflow encourages humidity buildup.
- Dirty Ducts or Filters:Accumulated dust acts as a food source for mold spores.
- Temperature Variations:Warm environments with trapped moisture create ideal conditions for mold growth.
Steps to Remove Mold from an HVAC System
- Turn Off the System:Ensure that the system is powered down to prevent further spread of spores during cleaning.
- Check drip pans for water pooling.
- Assess ductwork and insulation materials for visible contamination.
- Use EPA-approved mold cleaners on non-porous surfaces like metal ducts and coils.
- Replace filters immediately with high-efficiency particulate air (HEPA) options if possible.
- Discard excessively damaged insulation or porous components that cannot be cleaned effectively.
- Apply an antimicrobial treatment across surfaces inside the ductwork to minimize recurrence.
Note: Always wear personal protective equipment (PPE), such as gloves and respiratory masks during this process.
When to Call a Professional
| Scenario | Why Professional Help is Necessary |
| Widespread Mold Contamination | Professionals have specialized tools to handle large-scale infestations safely. |
| Health Concerns | Individuals with asthma or allergies should avoid exposure during cleanup efforts. |
| Structural Damage | Extensive repairs may require expertise beyond standard cleaning protocols. |
Preventing Future Growth in Your HVAC System
- Maintain indoor humidity levels below 50%.
- Perform routine maintenance such as cleaning drip pans and inspecting condensation lines.
- Replace air filters regularly (every 1–3 months depending on use).
- Schedule annual professional inspections for ducts and overall system performance.
By recognizing signs early and implementing effective solutions, homeowners can ensure their HVAC systems remain free from harmful mold while safeguarding indoor air quality for everyone in their household.
Top Methods for Effective and Safe Mold Removal in Residential Properties
Mold removal is a critical process for maintaining a safe and healthy living environment. When dealing with mold in your home, it’s essential to use effective and safe methods to ensure the issue is completely resolved while minimizing harm to your property and health. Below, we outline some of the top methods used for residential mold remediation, along with best practices to follow.
Mold thrives in damp environments, so identifying and addressing the moisture source is the first step toward effective removal. Without eliminating this underlying issue, mold is likely to return even after cleanup efforts.
- Leaking pipes or plumbing fixtures
- Poor ventilation in bathrooms or kitchens
- Roof leaks or water intrusion from damaged gutters
- Condensation from HVAC systems
Fixing these problems should be prioritized before beginning mold remediation.
To prevent mold spores from spreading throughout your home during cleanup, containment measures are vital. Professionals often use physical barriers like plastic sheeting or negative air pressure machines to isolate the affected area.
- Closing off doors and vents leading to other parts of the house
- Using HEPA air filters during cleanup
Effective containment ensures that spores remain localized.
Different surfaces require different cleaning approaches depending on their material type and extent of contamination.
| Surface Type | Cleaning Method | Recommended Products |
| Porous materials (e.g., drywall) | Remove and replace if heavily infested | N/A – replacement required |
| Non-porous surfaces (e.g., tiles) | Scrubbing with detergent/water solution | Bleach, hydrogen peroxide (use sparingly) |
| Fabrics (e.g., upholstery) | Laundry wash or professional treatment | Mild laundry detergent |
Ensure that you wear gloves and masks when using cleaning agents.
After cleaning visible mold colonies, it’s essential to remove residual spores that may linger on surfaces like carpets or furniture. High-Efficiency Particulate Air (HEPA) vacuum cleaners are highly effective at trapping fine particles such as mold spores without releasing them back into the air.
- Prevents spores from resettling elsewhere in your home
- Reduces allergen levels for improved indoor air quality
Once vacuuming is complete, ensure proper disposal of vacuum bags or filters in sealed plastic bags.
While DIY methods may work for minor infestations, larger mold issues often require specialized expertise.
- Mold covers an area larger than 10 square feet
- The infestation has spread into HVAC systems
- Individuals in your household have respiratory conditions aggravated by mold exposure
Professionals have access to advanced tools like infrared cameras for moisture detection and industrial-grade antimicrobial treatments.
Key Safety Tips During Mold Removal Process
- Always wear personal protective equipment (PPE), such as gloves, goggles, and N95 respirators.
- Avoid mixing cleaning agents like bleach with ammonia.
- Ensure adequate ventilation during cleanup.
Taking such precautions minimizes exposure risks during remediation efforts.
By using these proven techniques alongside preventive measures like managing humidity levels indoors, homeowners can ensure long-term protection against harmful molds.
Top Methods for Effective and Safe Mold Removal in Residential Properties
Removing mold from residential properties requires a methodical and safe approach to protect both the individuals living in the home and the structural integrity of the property. Below are some of the most effective and safe ways to handle mold removal, along with important steps to prevent its recurrence.
1.Identify and Isolate Affected Areas
To begin, it’s essential to locate the areas impacted by mold growth.
- Conducting a thorough inspection of spaces prone to moisture accumulation, such as basements, bathrooms, kitchens, or crawl spaces.
- Using proper protective equipment (e. g. , gloves, masks, goggles) during inspection to avoid exposure to mold spores.
- Sealing off affected areas with plastic sheeting or barriers to prevent spores from spreading during removal.
2.Choose Appropriate Cleaning Agents
Using the right cleaning solution is critical when dealing with mold.
- Vinegar: A natural solution that kills up to 82% of mold species on porous surfaces like wood and drywall. It’s non-toxic and safe for homes with children or pets.
- Bleach: Effective for non-porous surfaces like tiles or countertops but not suitable for porous materials as it doesn’t penetrate deeply enough.
- Hydrogen Peroxide: Both a disinfectant and antifungal agent that works on various surfaces without harmful fumes.
- Commercial Mold Cleaners: Formulated specifically for stubborn infestations; always follow manufacturer instructions.
3.Physical Removal Techniques
| Surface Type | Recommended Methodology |
| Porous (e.g., drywall) | Cut out affected material entirely if heavily damaged. |
| Non-Porous (e.g., tile) | Scrub using brushes paired with appropriate cleaning agents. |
| Fabric Materials | Launder them in hot water where possible or dispose if damage is extensive. |
Always work gently when handling fragile materials while ensuring complete removal of visible growth.
4.Invest in Air Filtration Devices
Airborne mold spores can linger even after surface-level cleaning is complete.
- Use HEPA-filtered vacuums when cleaning areas post-remediation.
- Consider installing portable air purifiers equipped with HEPA filters in high-moisture rooms.
- Regularly replace HVAC filters, especially if HVAC systems were exposed to mold spores.
5.Dry and Dehumidify Affected Areas Post-Cleanup
- Use dehumidifiers to maintain indoor humidity levels below 50%.
- Repair leaks in roofs, walls, or plumbing systems promptly.
- Increase ventilation by opening windows or installing exhaust fans in humidity-prone spaces like bathrooms.
6.When Should You Call a Professional?
- If the affected area exceeds 10 square feet based on EPA guidelines.
- When dealing with toxic molds such as Stachybotrys chartarum(commonly known as “black mold”), which requires specialized handling equipment.
- In situations involving HVAC systems – professionals can thoroughly clean ductwork without spreading spores throughout your home.
By following these top methods for addressing residential mold safely and effectively, homeowners can restore their living environments while minimizing risks associated with improper cleanup practices.
- The Importance of Prompt Mold Removal Deltona FL to Protect Your Home
- Mold Removal Deltona FL: How to Spot It After Water Damage and Prevent Future Issues
- Mold Removal Deltona FL: Understanding the Difference Between Abatement and Remediation
- What to Expect During Mold Remediation in Deltona FL and How Much It Costs
- Effective Mold Remediation Deltona FL: 3 Signs of Black Mold and How to Remove It
- Essential Tips for Mold Inspection Deltona FL: How to Spot Black Mold and Expert Tips for Mold Removal Deltona FL
- How to Determine If You Need Mold Removal Deltona FL Services
- Understanding Mold Remediation Deltona FL: Key Differences from Mold Removal
- Understanding Mold Removal Deltona FL: Costs and Key Factors to Consider
Effective Mold Remediation Deltona FL: 3 Signs of Black Mold and How to Remove It
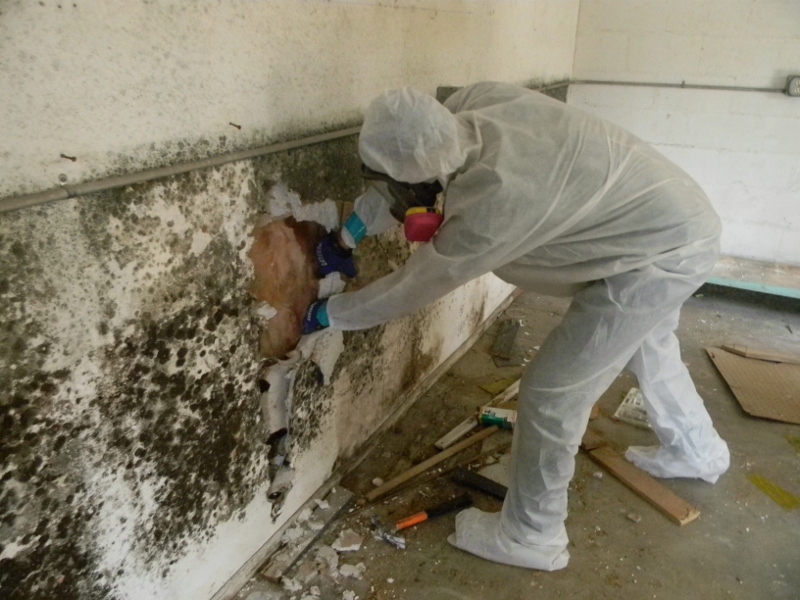
Black mold, also known as Stachybotrys chartarum, can pose significant health risks if not addressed promptly. Whether it’s in your home or workplace, identifying the signs of black mold early is essential for maintaining a safe environment. Below are three key indicators of black mold and effective strategies for removing it.
1. Visible Dark Spots or Growth
Black mold often appears as dark greenish-black or slimy patches on damp surfaces. It typically thrives in areas with high humidity or persistent moisture, such as:
– Bathrooms (around tiles, under sinks)
– Basements (on walls, floors, or ceilings)
– Kitchens (near leaky pipes or dishwashers)
If left unchecked, these patches can spread quickly to other surfaces like drywall and wood. Early detection is crucial to prevent extensive property damage.
2. Persistent Musty Odor
Even if you cannot see visible mold growth, a strong musty odor may indicate its presence. This smell often resembles the scent of rotting wood or damp clothing left in a confined space. If the odor persists after cleaning and airing out the space, it’s important to investigate hidden areas like:
– Behind walls and wallpaper
– Beneath carpets and flooring
– Inside HVAC systems
3. Allergy-Like Symptoms
Exposure to black mold can lead to noticeable health issues even before you spot any visual signs. Common symptoms include:
– Respiratory problems (such as coughing or wheezing)
– Skin irritation (rashes or itchiness)
– Watery eyes or nasal congestion
These symptoms often worsen over time if the source of mold isn’t addressed.
Effective Ways to Remove Black Mold Deltona FL
Once black mold has been identified, removing it promptly is essential to protect both your property and health.
Method 1: Use Natural Cleaning Solutions for Small Areas
For minor outbreaks (less than 10 square feet), natural solutions can be used safely: 1. Mix white vinegar with water in a 1:1 ratio. 2. Spray directly onto the affected area. 3. Scrub gently using a sponge or brush. 4. Allow the surface to dry completely.
Alternatively, baking soda mixed with water creates an abrasive paste that works well on porous materials like grout.
Method 2: Apply Commercial Mold Removal Products
For more stubborn cases, consider using EPA-approved commercial cleaning agents designed for mold removal: 1. Choose a product labeled “mold-killing” rather than just “mold-resistant.”
2. Follow the manufacturer’s instructions carefully. 3. Wear protective gloves and goggles while applying these chemicals.
Method 3: Address Hidden Mold with Specialized Tools
Mold behind walls or inside ventilation systems requires more comprehensive action: – Use a moisture meter to locate hidden damp areas. – Employ HEPA-filtered vacuum cleaners for initial cleanup. – Replace contaminated drywall if necessary.
Essential Tips for Mold Inspection Deltona FL and Preventing Recurrence
| Action | Details |
| Fix leaks quickly | Check plumbing regularly for leaks |
| Improve ventilation | Install exhaust fans in kitchens/bathrooms |
| Control indoor humidity | Use dehumidifiers; maintain levels below 50% |
| Clean regularly | Focus on damp-prone spaces like basements |
By addressing environmental factors that promote moisture buildup, you can significantly reduce the likelihood of recurring black mold issues within your home or office spaces.
Key Indicators for Mold Removal Deltona FL: What Black Mold Looks and Smells Like
Identifying black mold is an essential first step in addressing potential mold problems in your home or workplace. Understanding its visual and olfactory characteristics can help you distinguish it from other types of mold and take appropriate action. Below are key indicators to help you identify black mold effectively.
Comprehensive Guide to Mold Testing Deltona FL: Identifying Black Mold
Black mold, commonly referred to as Stachybotrys chartarum, often exhibits distinct visual traits that make it recognizable:
- Color:
True to its name, black mold generally appears in shades of dark green, gray, or black. It may also have a slightly slimy or shiny texture if it is actively growing in a moist environment. In some cases, dried-out colonies may appear powdery or flaky. - Shape and Growth Pattern:
Black mold typically grows in circular clusters but can spread irregularly over large surfaces if left unchecked. It thrives on porous materials such as wood, drywall, wallpaper, or fabric. You might notice discoloration or dark patches on surfaces where moisture is present. - Surface Damage:
Areas affected by black mold may show signs of deterioration, like peeling paint, warped drywall, or crumbling plaster. If you observe structural changes alongside visible discoloration, it could indicate an active infestation over time.
| Characteristic | Description |
| Color | Dark green, gray, or black |
| Texture | Slimy (when wet) / Powdery (when dry) |
| Common Surfaces | Wood, drywall, wallpaper |
| Growth Pattern | Circular clusters / Irregular spread |
How to Find the Best Mold Removal Company Deltona FL
- Musty Odor:
The smell of black mold is often described as damp and earthy with a strong musty quality. It may resemble the scent of decaying wood or wet soil and tends to linger even after airing out the space. - Persistent Scent:
The odor usually intensifies in rooms with poor ventilation and high humidity levels. If the smell becomes more pronounced when air conditioning systems are running or after periods of rainfall, this could indicate hidden mold growth within walls or HVAC systems.
Conditions That Promote Black Mold Growth
- High Humidity Levels (Above 60%): Environments with consistent moisture provide ideal conditions for growth.
- Water Damage Areas: Leaks from roofs, pipes, flooding incidents contribute significantly.
- Poor Ventilation: Spaces like basements or bathrooms without proper airflow trap moisture.
- Organic Materials: Surfaces such as paper-backed drywall and untreated wood act as food sources for spores.
How to Confirm if It’s Black Mold
- Perform a tape-lift test by pressing clear adhesive tape onto the suspected surface and sending it to a certified lab for analysis.
- Purchase at-home testing kits designed specifically for detecting toxic molds.
- Consult with professional remediation services if the infestation appears extensive.
Timely identification ensures that mitigation strategies are effective while preventing further health risks associated with exposure to toxic spores prevalent in black molds’ lifecycle. Addressing both visual evidence and odors can provide clarity on whether professional intervention is required immediately.
Signs of Black Mold and Effective Ways to Remove It
Black mold, scientifically referred to as Stachybotrys chartarum, is a common household problem that can pose serious health risks if left untreated. Identifying its presence early and addressing it promptly is essential. This section outlines the key signs of black mold and provides effective removal strategies.
Signs of Black Mold
- Black mold often appears as dark green, black, or grayish patches on walls, ceilings, or other surfaces.
- It may have a slimy or fuzzy texture when wet and look powdery when dry.
- A distinct musty or earthy smell is often associated with black mold. This odor may persist even if the mold is hidden behind walls or under flooring.
- It thrives in damp environments like bathrooms, basements, kitchens, or areas affected by leaks or flooding.
- Common surfaces include drywall, wood paneling, carpeting, grout lines, and insulation materials.
- Prolonged exposure can lead to symptoms such as coughing, sneezing, itchy eyes, headaches, fatigue, and even respiratory issues.
- People with allergies or compromised immune systems may notice heightened reactions in the presence of black mold.
Effective Ways to Remove Black Mold
- Wear protective gear such as gloves, goggles, masks (preferably N-95), and long-sleeved clothing to avoid direct contact with spores.
- Isolate the affected area by sealing doors and vents with plastic sheeting to prevent spores from traveling.
- Use Cleaning Solutions:
Common cleaning agents for black mold removal include:
| Solution | How to Use |
| Vinegar | Spray undiluted white vinegar on affected surfaces; let it sit for an hour before scrubbing off with a brush. |
| Baking Soda + Water | Create a paste using baking soda and water; scrub gently onto the surface before wiping clean. |
| Bleach (Caution) | Mix 1 cup of bleach with 1 gallon of water; apply carefully on non-porous surfaces only using a sponge.* |
*Note: Avoid using bleach on porous materials like wood or drywall as it doesn’t effectively penetrate these surfaces.
- Scrub Contaminated Surfaces:
Use stiff-bristle brushes to thoroughly scrub away visible growth on hard surfaces such as tiles or countertops. - Dispose of Contaminated Materials:
If porous materials like carpets or drywall are heavily infested:- Remove them entirely since these items can trap spores even after cleaning.
- Seal discarded materials in plastic bags before disposing them safely according to local waste guidelines.
- Dry the Area Thoroughly:
After cleaning:- Use dehumidifiers or fans to ensure the area is completely dry.
- Address any underlying moisture issues (e.g., leaks) promptly to prevent recurrence.
Prevention Measures
To reduce the chances of future outbreaks: – Maintain indoor humidity levels between 30–50%. Use a hygrometer for monitoring. – Fix leaks in roofs, pipes, windowsills immediately upon discovery. – Ensure proper ventilation in bathrooms and kitchens by installing exhaust fans. – Clean gutters regularly to prevent water buildup around your home’s foundation.
By recognizing these signs early and following these proven removal methods effectively, you can safeguard your home against black mold while minimizing health risks associated with its presence.

Step-by-Step Guide for DIY Mold Removal at Home
Removing mold from your home can be a manageable task if done correctly. While professional help is sometimes necessary, small-scale mold problems can often be addressed with a systematic DIY approach. Below is a step-by-step guide to help you tackle mold removal safely and effectively.
Step 1: Assess the Extent of the Mold Problem
Before starting the removal process, evaluate the severity of the mold growth:
– Small areas: Less than 10 square feet, such as corners of bathrooms or under sinks, are generally safe for DIY removal.
– Larger areas: If affected areas exceed 10 square feet or include HVAC systems, consider consulting a professional.
– Hidden mold: If you notice musty odors without visible growth, it may indicate hidden mold that requires specialized equipment to detect.
Step 2: Gather Necessary Supplies
Proper tools and materials are essential for safe and effective mold removal. Here’s a list of what you’ll need:
– Protective gear:
– N95 mask or respirator mask
– Safety goggles or glasses
– Non-porous gloves (rubber or nitrile)
– Cleaning solutions:
– White vinegar (undiluted)
– Baking soda (optional for scrubbing)
– Commercial mold remover or bleach solution (1 cup bleach per gallon of water)
– Tools and cleaning items:
– Scrub brush or sponge
– Microfiber cloths
– Spray bottle
– Bucket and disposable trash bags
Step 3: Prepare the Area
Mold spores can easily spread during cleaning, so containment is critical. Follow these precautions to minimize cross-contamination:
1. Seal off contaminated areas using plastic sheeting and painter’s tape if necessary.
2. Turn off fans, HVAC systems, and air purifiers to prevent spores from circulating through your home’s air ducts.
Step 4: Apply Cleaning Solution
For non-porous surfaces like tiles, glass, metal, or sealed wood: 1. Spray white vinegar directly onto the affected area and let it sit for at least one hour. 2. Scrub gently with a brush to remove visible mold stains. 3. Wipe away residue with a damp cloth and allow surfaces to dry completely.
For porous materials such as drywall, carpets, or untreated wood: – In some cases, these materials may need to be replaced entirely as they absorb moisture deeply and cannot always be cleaned effectively.
Step 5: Dispose of Contaminated Materials Safely
Collected debris like sponges or damaged materials should be bagged immediately in heavy-duty trash bags to prevent further contamination before disposal.
Step 6: Dry and Ventilate the Area
Once all visible mold has been removed: 1. Use dehumidifiers to reduce moisture levels below 50%. 2. Open windows where possible to increase airflow in affected spaces.
| Key Steps | Best Practices |
| Containment | Use plastic sheeting & seal vents |
| Cleaning Solutions | Use natural options like vinegar |
| Disposal | Double-bag contaminated items |
Step 7: Prevent Future Mold Growth
After removing existing mold: – Fix leaks promptly in pipes, roofs, or windows. – Ensure proper ventilation in high-moisture areas such as bathrooms and kitchens. – Regularly clean gutters to prevent water buildup near your home’s foundation.
By following this step-by-step guide carefully, homeowners can address minor infestations while maintaining safety standards throughout the process.
The Health Risks of Black Mold Exposure and Why You Should Act Quickly
Black mold, scientifically known as Stachybotrys chartarum, is a toxic fungus that can pose significant health risks. While many types of mold are relatively harmless, black mold stands out for its potential to cause serious complications, particularly when exposure is prolonged. It thrives in damp and humid conditions, making it a common concern in households with water damage or high humidity levels. Understanding the associated health risks is crucial to ensure timely action.
Common Symptoms of Black Mold Exposure
- Persistent coughing or wheezing
- Difficulty breathing or shortness of breath
- Aggravation of asthma symptoms
- Sneezing and nasal congestion
- Red, itchy eyes
- Skin irritation or rashes
- Neurological Effects (in severe cases):
- Headaches or migraines
- Fatigue and dizziness
- Difficulty concentrating (often referred to as “brain fog”)
At-Risk Populations
| Vulnerable Group | Reason for Increased Risk |
| Children | Developing immune systems make them more susceptible |
| Elderly Individuals | Weaker immune systems and pre-existing health issues |
| People with Respiratory Conditions | Pre-existing asthma, COPD, or allergies exacerbate symptoms |
| Immunocompromised Individuals | Reduced ability to fight off mold-related infections |
Long-Term Health Implications
- Development of chronic respiratory conditions such as asthma
- Infections in the lungs for individuals with weakened immune systems
- Toxicity that affects neurological functions, leading to memory loss or confusion
It’s important to note that long-term effects often require extensive decontamination efforts and medical intervention.
Why Swift Action Is Essential
- Increased Spore Growth: Mold spreads rapidly under ideal conditions (dampness combined with warmth), making it harder to contain over time.
- Structural Damage: Black mold gradually eats away at surfaces such as drywall, wood, and insulation.
- Higher Remediation Costs: Delaying removal leads to extensive damage requiring professional intervention.
- Escalating Health Risks: Continued exposure increases susceptibility to severe health issues.
Preventative Measures
- Use an N95 mask when cleaning small areas.
- Seal off affected areas from living spaces using plastic sheeting.
- Ensure proper ventilation by opening windows if weather permits.
By addressing signs of black mold promptly and following these steps, you can mitigate potential hazards while safeguarding your health effectively.
When to Call a Professional for Safe and Thorough Mold Removal
Mold removal can often be managed with DIY methods for small, localized problems, but certain situations require the expertise of a professional. Knowing when to seek professional help ensures the safety of your home and family while preventing further complications. Below is a comprehensive guide on when it’s time to call in the experts.
Extensive Mold Infestation
When mold growth exceeds 10 square feet or spreads across multiple areas of your home, it’s typically too large to handle with DIY methods. Professionals have specialized equipment and training to safely remove mold from large areas without spreading spores to other parts of the property.
Mold in HVAC Systems
If mold is detected in your heating, ventilation, or air conditioning (HVAC) system, it’s crucial to contact a professional. HVAC systems can circulate harmful mold spores throughout your home if not properly cleaned. Professionals use advanced tools and techniques to thoroughly clean ductwork and ensure the system is safe for operation.
Recurring Mold Issues
If you’ve removed mold yourself but continue to see it reappear, this could indicate an underlying moisture issue that hasn’t been resolved. Professionals can identify hidden sources of moisture or water damage that may be contributing to persistent mold problems.
Health Concerns
Exposure to black mold and other toxic molds can lead to serious health issues, particularly for individuals with weakened immune systems, allergies, asthma, or other respiratory conditions. If anyone in your household experiences unexplained symptoms like coughing, sneezing, skin irritation, or breathing difficulties—and there is visible mold present—it’s time for professional assistance.
Structural Damage from Mold
In severe cases where mold has penetrated porous materials such as drywall, insulation, or wood framing, structural damage could occur. Attempting to address this on your own may worsen the problem or compromise the integrity of your home. Professionals have the knowledge necessary for assessing damage and recommending appropriate remediation steps.
Situations Involving Toxic Black Mold
Black mold (Stachybotrys chartarum) is particularly dangerous due to its potential toxicity. If you suspect black mold based on its appearance (dark greenish-black patches) or smell (musty odor), consult an expert immediately rather than attempting removal on your own.
Benefits of Hiring Professionals
- Expertise: Professionals are trained in identifying different types of molds and tailoring their removal strategies accordingly.
- Advanced Equipment: They use industrial-grade equipment like HEPA vacuums and air scrubbers designed specifically for handling hazardous materials.
- Thorough Inspection: Experts perform detailed inspections using tools such as thermal imaging cameras and moisture meters to locate hidden sources of contamination.
- Preventing Cross-Contamination: Proper containment methods are employed during remediation projects so that disturbed spores don’t spread throughout unaffected areas.
| DIY Mold Removal | Professional Mold Remediation |
| Limited effectiveness | Comprehensive solutions |
| Risk of improper handling | Safe disposal practices |
| May miss hidden infestations | Full inspection & prevention plans |
Recognizing when professional intervention is necessary can save time, money, and unnecessary risks associated with ineffective treatment efforts. By relying on experts with proper certifications like IICRC (Institute of Inspection Cleaning and Restoration Certification), you ensure high-quality results that safeguard both health and property.
- The Importance of Prompt Mold Removal Deltona FL to Protect Your Home
- Mold Removal Deltona FL: How to Spot It After Water Damage and Prevent Future Issues
- Mold Removal Deltona FL: Understanding the Difference Between Abatement and Remediation
- What to Expect During Mold Remediation in Deltona FL and How Much It Costs
- Effective Mold Remediation Deltona FL: 3 Signs of Black Mold and How to Remove It
- Essential Tips for Mold Inspection Deltona FL: How to Spot Black Mold and Expert Tips for Mold Removal Deltona FL
- How to Determine If You Need Mold Removal Deltona FL Services
- Understanding Mold Remediation Deltona FL: Key Differences from Mold Removal
- Understanding Mold Removal Deltona FL: Costs and Key Factors to Consider
Essential Tips for Mold Inspection Deltona FL: How to Spot Black Mold and Expert Tips for Mold Removal Deltona FL
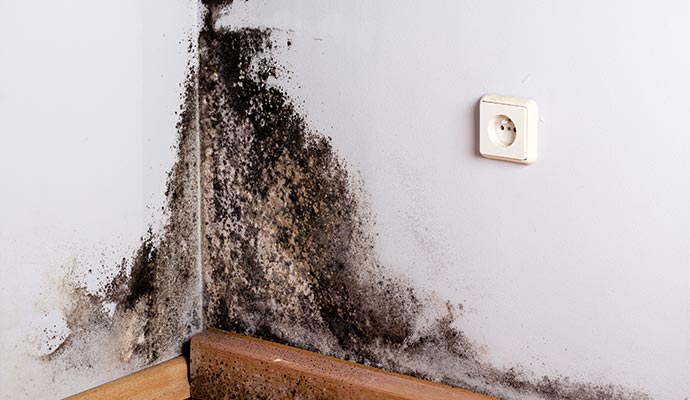
Black mold, scientifically known as Stachybotrys chartarum, is a type of fungal growth commonly found in damp or water-damaged environments. It is characterized by its dark green or black appearance and thrives on materials rich in cellulose, such as wood, drywall, and paper. Identifying black mold early is crucial to prevent health-related risks and structural damage to your property.
Effective Mold Remediation Deltona FL: Identifying Black Mold Characteristics
- Color: Dark green, black, or grayish-black patches.
- Texture: Slimy or wet when active; powdery when dried out.
- Odor: Musty or earthy smell often associated with damp environments.
Distinguishing black mold from other types of molds requires careful observation. While not all dark molds are toxic, it’s essential to treat any suspected growth seriously.
Identifying Common Areas for Black Mold in Deltona FL
- Bathrooms (behind tiles, shower curtains)
- Kitchens (under sinks, near leaky pipes)
- Basements (on walls, ceilings, or stored items)
- Around windowsills where condensation accumulates
- Attics (especially near roof leaks)
Regularly inspecting these locations helps ensure you catch potential problems early.
How to Identify Black Mold
- Look for dark stains or spots on surfaces prone to moisture exposure.
- Check hidden areas such as under carpets or behind walls if there’s a history of water damage.
- A persistent musty odor can indicate the presence of mold colonies even if they’re not visible initially.
- Use a moisture meter to detect dampness in walls and floors that may contribute to mold growth.
- If you suspect black mold but are uncertain, consider professional testing services that can confirm its presence through samples analyzed in laboratory conditions.
| Identification Method | Purpose | Tools Required |
| Visual Inspection | Spot visible colonies | Flashlight |
| Smell Detection | Detect hidden infestations | None |
| Moisture Testing | Locate damp areas | Moisture meter |
| Professional Testing | Confirm type of mold | Laboratory services |
When Should You Seek Professional Mold Testing Deltona FL?
- The affected area exceeds 10 square feet.
- The infestation is located in HVAC systems or hard-to-reach places.
- Persistent health symptoms like allergies worsen after exposure.
By understanding what black mold looks like and where it thrives, homeowners can take proactive measures to mitigate its risks effectively while maintaining a safe living environment.
Finding the Best Mold Removal Company Deltona FL for Safe and Effective Black Mold Solutions
Removing black mold from your home requires a combination of proper techniques, safety precautions, and the right tools. Black mold can pose significant health risks, so handling it with care is essential. Below is a detailed guide outlining effective and safe methods for removing black mold.
Safety Precautions Before Removal
- Gloves (preferably non-porous or rubber gloves)
- N95 respirator mask or similar
- Safety goggles without ventilation holes
- Long-sleeved clothing and pants that can be washed or discarded after use
- Seal off the room by closing doors and covering vents with plastic sheeting.
- Use duct tape to secure the plastic covers to prevent mold spores from spreading.
- Open windows where possible.
- Avoid using fans as they can spread spores throughout your home.
Materials and Tools You’ll Need
| Tool/Material | Purpose |
| Scrub brush | To scrub away visible mold colonies |
| Spray bottle | For applying cleaning solutions |
| HEPA vacuum | To clean up loose spores post-removal |
| Disposable rags or cloths | For wiping surfaces |
| Household detergent | For general cleaning before treatment |
| Mold-killing agent | Such as hydrogen peroxide (3%) or white vinegar |
| Plastic bags | To safely dispose of contaminated materials |
Steps for Effective Black Mold Removal
- Assess the Extent of Contamination: Inspect the affected areas thoroughly. If the mold covers more than 10 square feet, consider hiring a professional remediation service as large-scale infestations may require advanced equipment.
- Prepare a Cleaning Solution: Choose an appropriate cleaning solution:
- Mix one part hydrogen peroxide with two parts water.
- Alternatively, undiluted white vinegar can be effective against many mold strains.
- Spray the solution generously over the affected area.
- Allow it to sit for at least 10–15 minutes so it can penetrate into porous surfaces.
- Scrub Away Visible Mold: Use a stiff-bristled brush to scrub away visible mold growth while applying even pressure. Rinse your brush regularly during this process.
- Remove Excess Moisture: Wipe down cleaned surfaces with disposable rags or absorbent towels to remove moisture. Dispose of used cloths directly into sealed plastic bags.
- HEPA Vacuuming: After scrubbing and drying, use a HEPA-filter vacuum cleaner on nearby surfaces to pick up any remaining spores that may not be visible to the naked eye.
- Dispose of Contaminated Materials Safely: Place all used protective gear (gloves, masks) and cleaning materials into tightly sealed garbage bags for disposal in an outdoor waste bin.
- Monitor for Recurrence: Keep an eye on treated areas over time for signs of new growth and address any underlying moisture issues immediately (e.g., leaks).
Tips for Preventing Mold Growth After Removal
To minimize future occurrences: – Fix water leaks promptly. – Improve indoor ventilation by using exhaust fans in kitchens and bathrooms. – Maintain indoor humidity levels below 50% using dehumidifiers if necessary.
By following these steps carefully, you can effectively remove black mold while ensuring safety at every stage of the process.
How to Remove Black Mold Using Effective and Safe Methods
Removing black mold from your home is a crucial step in ensuring a safe and healthy living environment. Black mold, often identified as Stachybotrys chartarum, thrives in damp areas and can cause significant health risks when left untreated. Below are effective and safe methods for eliminating black mold, minimizing its reappearance, and protecting your household.
Steps for Removing Black Mold Safely
- Identify the extent of the mold growth.
- Determine whether it’s safe to clean it yourself or if professional help is required (e.g., for extensive infestations over 10 square feet).
- Gather Protective Gear
Before beginning removal, wear appropriate personal protective equipment (PPE) to avoid exposure: - N95 respirator mask or higher-grade mask
- Non-porous gloves (e.g., rubber or nitrile)
- Protective goggles without ventilation holes
- Long-sleeved clothing that can be washed or discarded afterward
- Contain the Mold Area
Prevent spores from spreading by: - Sealing doors and vents using plastic sheeting and tape.
- Using an exhaust fan to direct airflow outside.
- Prepare Cleaning Solutions
Choose one of these commonly used cleaning agents based on the surface type:
| Cleaning Solution | Application Notes |
| Bleach Solution (1 cup bleach + 1 gallon water) | Use for non-porous surfaces like tiles and glass; do not mix with ammonia-based cleaners. |
| White Vinegar | Spray undiluted onto affected areas; suitable for porous materials like drywall or wood. |
| Baking Soda Mixture (1 tsp baking soda + 2 cups water) | Gentle cleaner ideal for small areas of growth on various surfaces. |
- Remove the Mold
Follow these steps carefully: - Scrub affected non-porous surfaces with your selected cleaning solution using a sponge or brush.
- For porous materials like drywall, removal may be necessary as mold often penetrates deeply.
- Avoid excessive water during cleaning as moisture can promote further growth.
- Dry the Area Thoroughly
After cleaning, use fans, dehumidifiers, or open windows to ensure surfaces dry completely within 24-48 hours. - Dispose of Contaminated Materials Properly
Place any discarded materials such as drywall pieces, rags, or heavily contaminated furniture into heavy-duty trash bags immediately after removal.
Preventative Measures After Removal
- Fix leaks promptly in plumbing, roofing, or other areas prone to water intrusion.
- Use dehumidifiers in high-humidity zones (e.g., bathrooms).
- Ensure proper ventilation by installing exhaust fans in moisture-prone spaces.
- Regularly inspect areas susceptible to dampness such as basements and kitchens.
By following these steps thoroughly, you can effectively eliminate black mold from your home while safeguarding your health during the process.
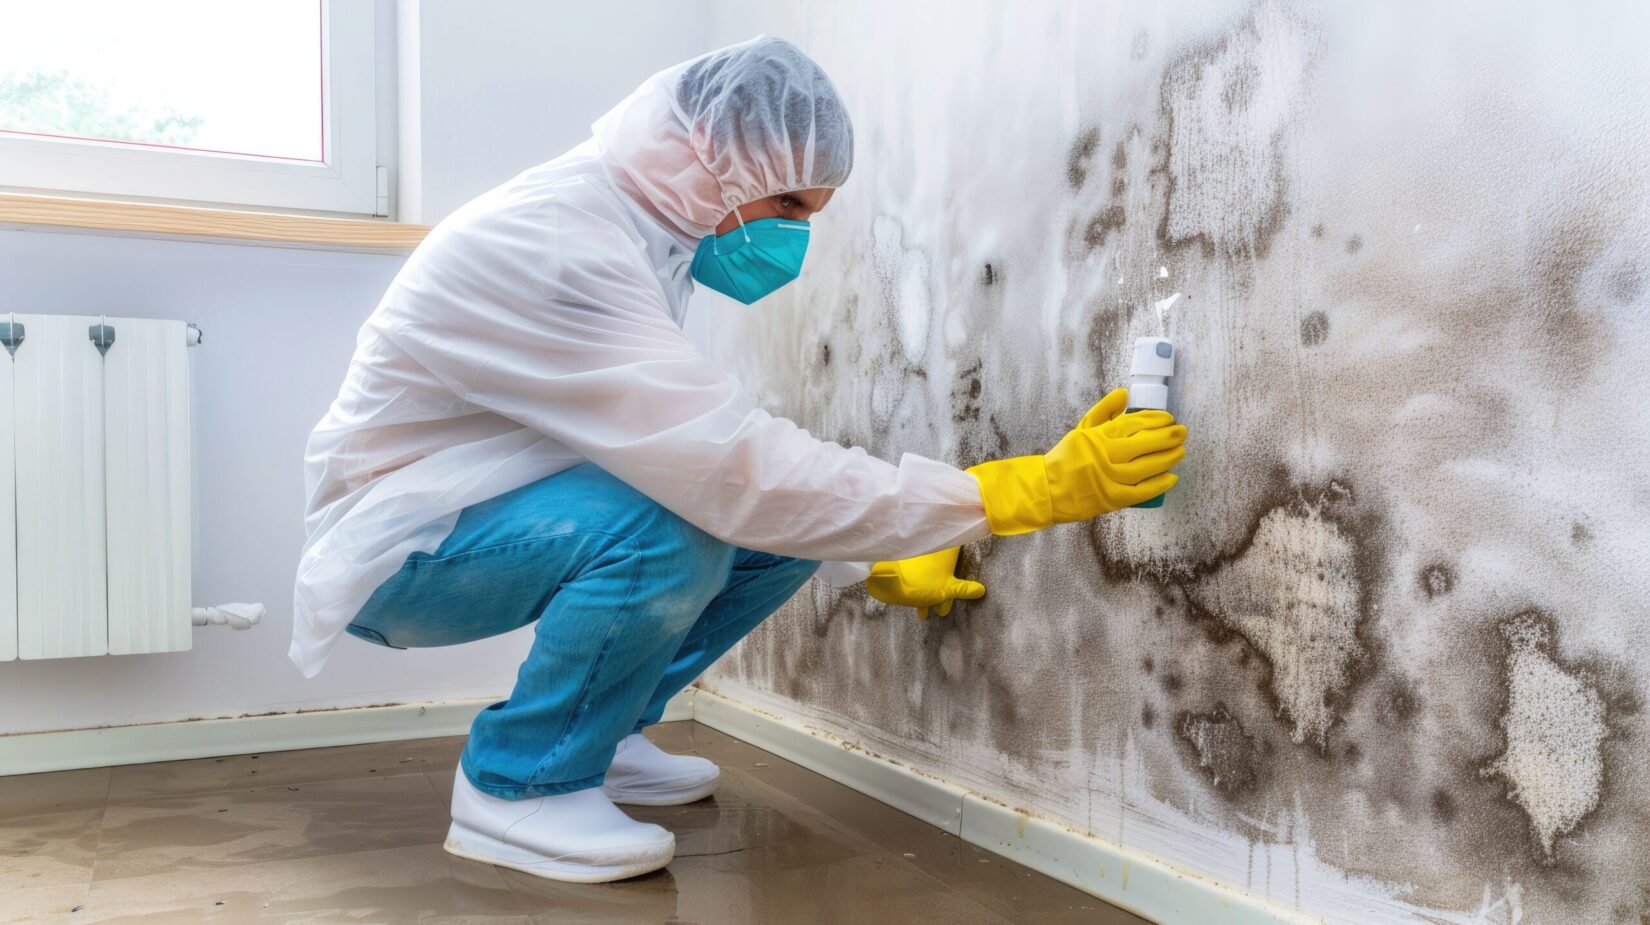
How to Remove Black Mold Using Effective and Safe Methods
Removing black mold from your home requires a methodical and safe approach to ensure the health of occupants and the complete elimination of the mold. This process involves preparation, using appropriate cleaning methods, and taking precautions to prevent its recurrence. Below is a detailed guide on how to safely remove black mold.
1. Prepare for Mold Removal
- Assess the Area: Determine the extent of the infestation. Small areas (less than 10 square feet) can typically be handled on your own, while larger infestations may require professional assistance.
- Wear Protective Gear: To protect yourself from harmful spores, wear:
- N95 respirator or better
- Rubber gloves
- Safety goggles
- Isolate the Affected Area: Seal off doors and air vents to contain mold spores during cleaning. Use plastic sheeting if necessary.
- Turn Off HVAC Systems: Prevent the spread of spores through air circulation by shutting off heating or cooling systems.
2. Gather Essential Cleaning Supplies
| Cleaning Supplies | Purpose |
| Bleach (or alternatives like vinegar) | Disinfects hard surfaces |
| Detergent/soap | Cleans dirt and debris |
| Scrub brushes/sponges | Used for scrubbing away visible mold |
| Microfiber cloths | Wipes down surfaces without spreading spores |
| HEPA vacuum cleaner | Removes loose spores post-cleaning |
3. Cleaning Small Areas with Black Mold
- Mix a cleaning solution (e.g., one cup of bleach diluted in one gallon of water).
- Use a scrub brush or sponge to clean all affected surfaces thoroughly.
- Avoid dry scrubbing as it may release spores into the air.
- Wipe cleaned areas with a damp cloth soaked in clean water.
- Allow surfaces to air-dry completely before proceeding.
- Remove porous items like carpets, insulation, or drywall if heavily contaminated.
- Place these materials in sealed plastic bags for proper disposal.
4. Address Larger Infestations Safely
- Consider hiring certified professionals trained in mold remediation.
- Professionals use specialized equipment such as negative air machines, industrial-strength cleaners, and protective barriers to ensure thorough removal.
5. Preventing Mold Regrowth
- Control Humidity Levels: Use dehumidifiers and maintain indoor humidity below 50%.
- Fix Leaks Promptly: Inspect pipes, roofs, and windows regularly for leaks.
- Promote Ventilation: Ensure adequate airflow in bathrooms, kitchens, basements, and other moisture-prone areas.
- Inspect Regularly: Check hidden spots such as under sinks or behind appliances where moisture may accumulate.
By following these guidelines thoughtfully and carefully, homeowners can effectively eliminate black mold while reducing risks associated with exposure.
Understanding the Steps in an 8-Step Mold Remediation Process
1. Inspection and Assessment
The first step in any mold remediation process is to thoroughly inspect the affected area. This includes:
– Identifying visible mold growth.
– Assessing hidden areas where moisture may have encouraged mold growth, such as inside walls or beneath floorboards.
– Using tools like moisture meters and thermal imaging cameras to detect dampness that fosters mold development.
A comprehensive inspection helps determine the scope of the problem and informs the next steps.
2. Containment of Affected Areas
To prevent mold spores from spreading to other parts of the property, containment measures are implemented:
– Use of plastic sheeting to seal off contaminated areas.
– Application of negative air pressure systems to isolate airflow within the space.
This step minimizes cross-contamination during removal activities.
3. Air Filtration and Purification
Air filtration devices equipped with HEPA filters are used to capture airborne spores, dust, and other particulates that could spread further contamination. In some cases, industrial-grade air scrubbers or dehumidifiers are employed for better efficiency.
4. Removal of Mold-Affected Materials
Non-salvageable materials such as drywall, insulation, carpets, or furniture must be removed and properly disposed of according to local regulations. Salvageable items can often be cleaned using specific cleaning agents designed for fungal removal.
5. Cleaning Surfaces with Specialized Solutions
- Hard Surfaces: Scrubbed using detergent solutions or antimicrobial treatments designed for killing mold spores.
- Porous Materials: Treated differently based on severity; minor contamination may allow cleaning with special fungicides, while heavy infestation often requires disposal.
Proper cleaning ensures no active spores remain that could potentially regrow.
| Material Type | Cleaning Method | Disposal Required? |
| Drywall | Remove if infected | Yes |
| Wood | Sand & seal if possible | No |
| Upholstery etc |
How to Test for Black Mold: Methods and Tools Explained
Testing for black mold is a critical step in safeguarding your home and health. Identifying the presence of mold early allows you to address the issue promptly, preventing structural damage and potential health risks. Below, we’ll explore different methods and tools used to test for black mold effectively.
Visual Inspection
- Color: Black mold is usually dark green or black in color.
- Texture: It may appear slimy or fuzzy depending on the surface it grows on.
- Location: Common areas include walls, ceilings, grout lines, HVAC systems, and under sinks.
- Odor: A musty smell can indicate hidden mold growth.
While a visual inspection can help identify obvious mold colonies, not all infestations are visible. For hidden mold issues, additional testing methods are required.
Air Sampling
Air sampling involves collecting air from inside your home and analyzing it for mold spores. This method is particularly useful if you suspect a hidden infestation or want to assess indoor air quality.
Key tools used in air sampling: – Spore traps: Devices that capture airborne particles on a sticky surface. – Laboratory analysis: Samples are sent to a lab where experts identify the type and concentration of spores present.
Pros: – Provides an accurate assessment of airborne spore levels. – Useful for identifying unseen or dormant infestations.
Cons: – Requires professional equipment or services. – May not pinpoint the exact location of the mold source.
Surface Testing
Surface testing involves swabbing or tape-lifting samples from suspected areas of contamination. This method directly analyzes physical surfaces for visible signs of black mold.
Steps involved: 1. Use a sterile swab or tape lift to collect material from affected areas. 2. Place the sample in a sealed container provided by a testing lab. 3. Send it for laboratory analysis to confirm if the substance is indeed black mold.
Advantages: – Useful for targeted testing of specific surfaces (e.g., drywall, furniture). – Confirms whether visible growth is toxic black mold or another type of fungus.
Limitations: – Does not measure airborne spore concentration. – Limited scope; only tests specific locations sampled.
DIY Mold Test Kits
For homeowners looking for cost-effective solutions, DIY mold test kits are readily available at hardware stores and online retailers. These kits contain materials necessary to test samples either by sending them to a lab or through at-home analysis.
Popular types of test kits include: | Type | Description | Cost Range | |———————–|————————————————————–|—————| | Petri Dish Kits | Collect spores on agar plates placed in your home | $10 – $30 | | Tape Lift Tests | Adhesive strips collect samples from surfaces | $15 – $40 | | Lab Submission Kits | Prepaid envelopes allow you to send samples to certified labs| $20 – $60 |
While DIY kits are convenient and affordable, they might lack precision compared to professional services. For severe infestations or persistent issues, expert intervention should be considered.
Professional Mold Testing Services
Hiring certified professionals ensures thorough testing using advanced tools like thermal imaging cameras and moisture meters. Professionals can also interpret results accurately while recommending appropriate remediation steps based on findings.
Benefits include: – Comprehensive assessment across multiple areas (visible & hidden). – Tailored remediation plans backed by scientific data.
Costs vary widely depending on property size but typically range between $300-$800 per inspection.
Effective testing methods depend on factors like budget constraints, severity of suspected contamination, and whether professional expertise is needed. Always prioritize safety when dealing with potential exposure risks by using proper PPE (e.g., gloves, masks) during inspections or sample collection processes. A proactive approach ensures peace of mind while maintaining healthy living spaces free from harmful mold growths.
- The Importance of Prompt Mold Removal Deltona FL to Protect Your Home
- Mold Removal Deltona FL: How to Spot It After Water Damage and Prevent Future Issues
- Mold Removal Deltona FL: Understanding the Difference Between Abatement and Remediation
- What to Expect During Mold Remediation in Deltona FL and How Much It Costs
- Effective Mold Remediation Deltona FL: 3 Signs of Black Mold and How to Remove It
- Essential Tips for Mold Inspection Deltona FL: How to Spot Black Mold and Expert Tips for Mold Removal Deltona FL
- How to Determine If You Need Mold Removal Deltona FL Services
- Understanding Mold Remediation Deltona FL: Key Differences from Mold Removal
- Understanding Mold Removal Deltona FL: Costs and Key Factors to Consider