
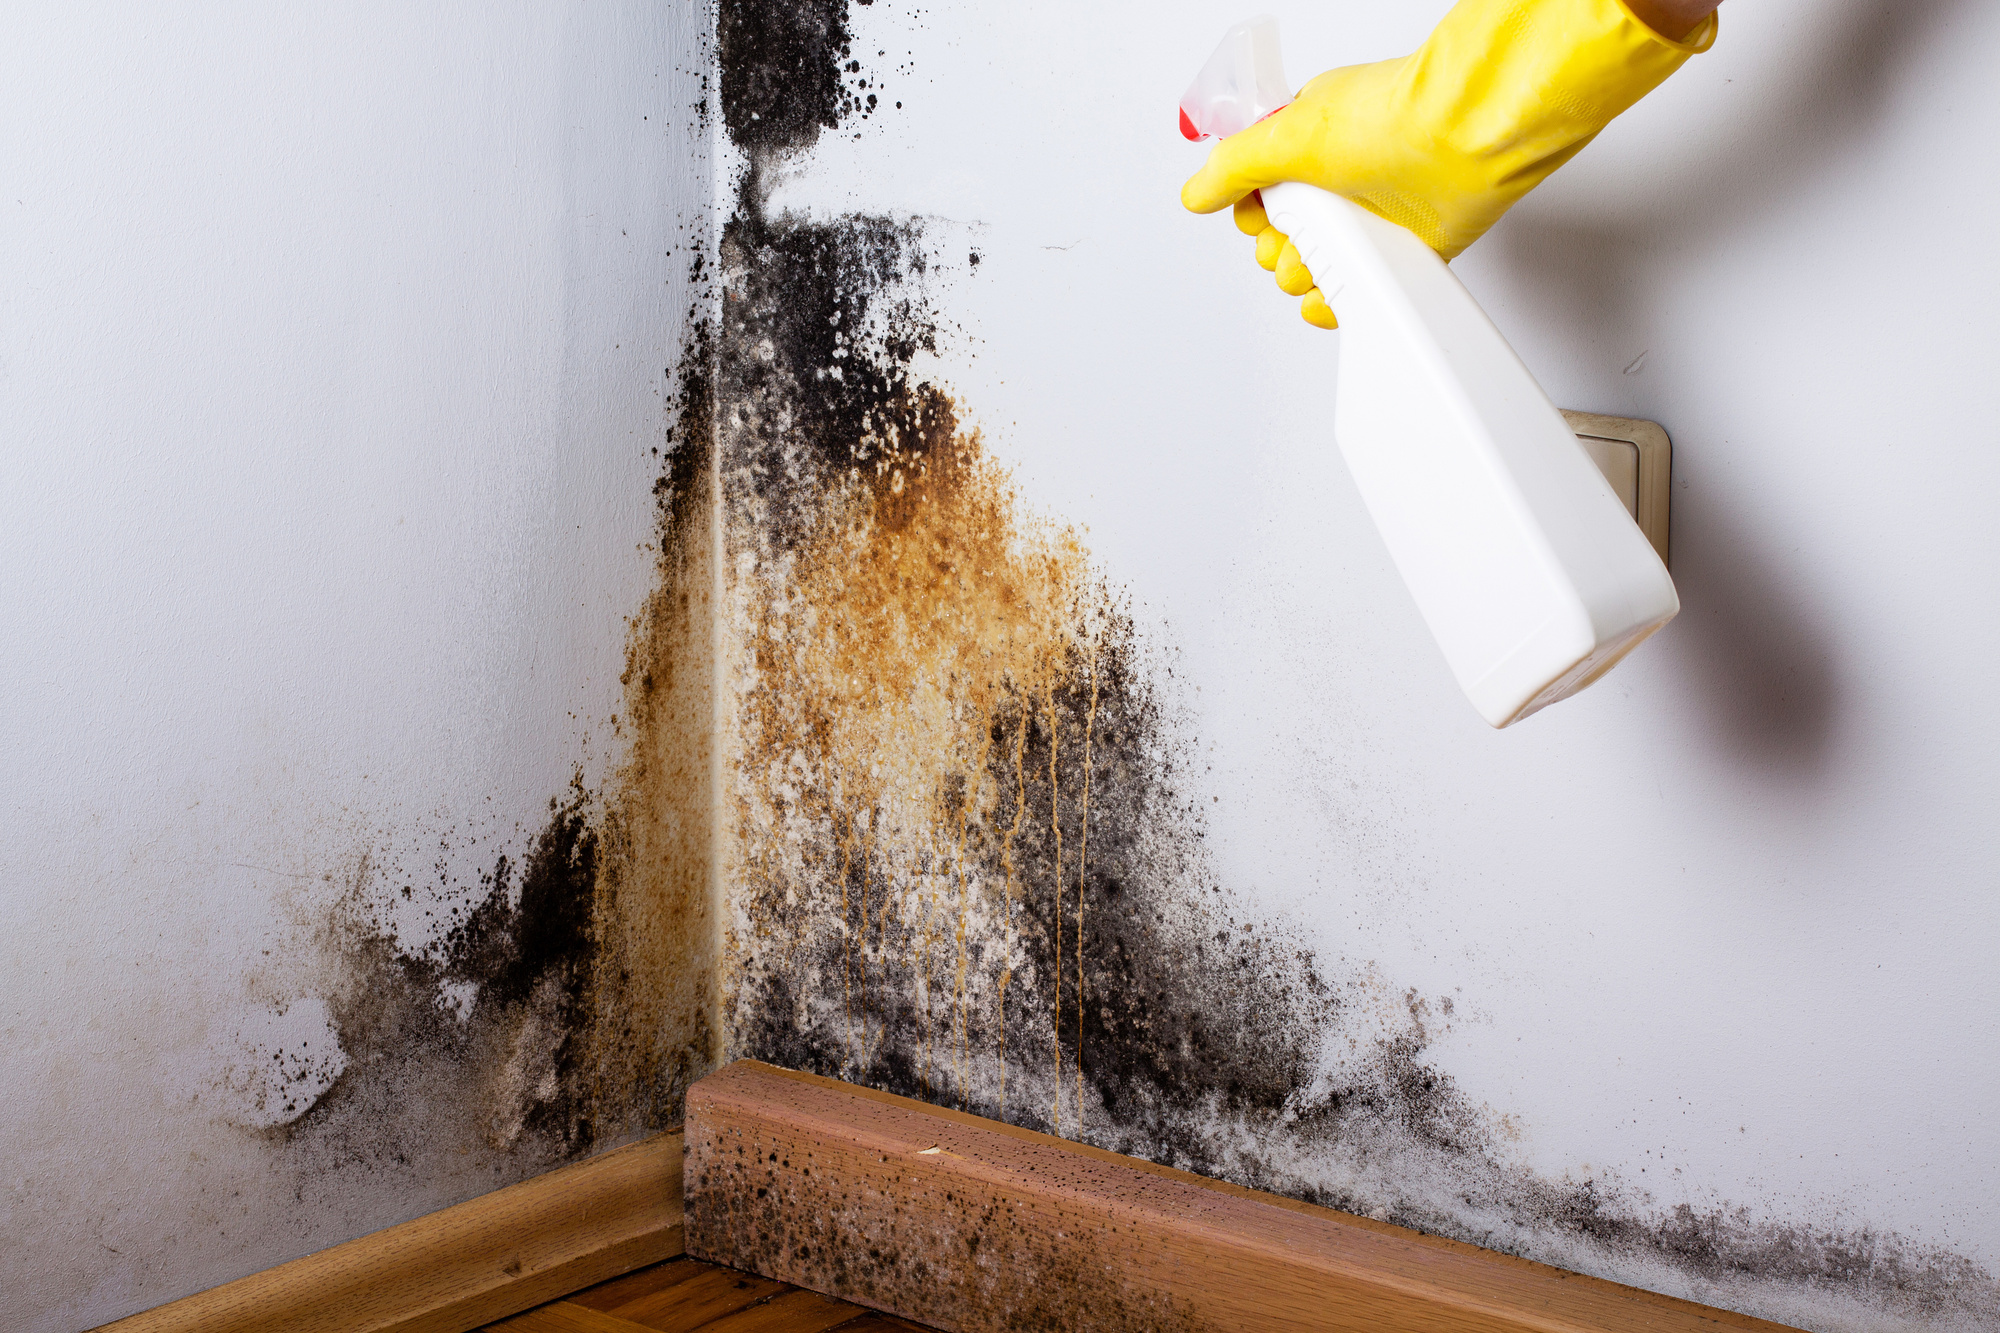
Mold remediation is an essential process for maintaining a safe and healthy living environment, especially when mold growth becomes significant. Understanding the costs involved and what to expect during the remediation process can help homeowners make informed decisions.
Factors Influencing Mold Remediation Costs
- Size of the Affected Area: Larger areas of mold contamination naturally require more labor and resources, leading to higher costs.
- Type of Mold: Certain types of molds, such as black mold (Stachybotrys), require specialized handling, which can increase overall expenses.
- Extent of Damage: If mold has infiltrated porous materials like drywall or flooring, these may need to be replaced, contributing to additional costs.
- Location in Home: Hard-to-reach areas like crawlspaces or attics may require more effort and specialized equipment, raising the price.
- Professional vs. DIY Approach: While DIY methods may save money upfront, professional services are often necessary for severe cases and come at a premium.
Average Cost Breakdown
| Service Type | Approximate Cost Range | Notes |
| Small Contaminated Area | $500 – $1,500 | Covers spaces under 10 square feet |
| Medium-Sized Areas | $1,500 – $3,000 | 10–50 square feet; typically includes drywall repair |
| Large Remediation Projects | $3,000 – $6,000 or more | Over 50 square feet; includes structural repairs if needed |
What to Expect During the Process
- A professional mold inspector evaluates your property for visible signs of mold.
- Moisture meters or infrared cameras may be used to locate hidden growth.
- The affected area is sealed off using plastic sheeting or other barriers.
- Negative air pressure systems are often deployed to prevent spores from spreading.
- Porous materials like carpets or drywall that cannot be salvaged are removed safely.
- Nonporous surfaces are cleaned using antimicrobial treatments.
- Air scrubbers equipped with HEPA filters are employed to remove airborne particles.
- After remediation is complete, damaged areas may need rebuilding or repainting.
- Professionals ensure the space is dry before repairs begin.
Additional Costs to Consider
- Mold Testing ($200-$600): Optional but recommended for pre- or post-remediation verification.
- HVAC Cleaning ($300-$800): Necessary if mold has spread into ductwork.
- Preventive Measures ($100-$500): Installation of dehumidifiers or improved ventilation can reduce future risks.
Investing in professional remediation ensures long-term safety while minimizing health hazards associated with prolonged exposure to mold.
Exploring the Costs of Mold Removal Deltona FL Per Square Foot
When it comes to mold remediation, understanding the cost is a critical step in planning the process. One of the most common methods used to estimate the price of mold removal is by calculating costs on a per-square-foot basis. This method ensures homeowners have a clear understanding of what they might expect depending on the size and scope of their mold problem. Below, we break down key factors influencing costs and provide insights into typical price ranges.
Understanding the Costs of Removing Black Mold Deltona FL
Several variables impact how much you will ultimately pay for mold remediation.
- Extent of Mold Growth: The larger the affected area, the higher the cost per square foot due to increased labor and materials required.
- Type of Mold: Toxic molds, such as black mold (Stachybotrys chartarum), often require more specialized equipment and containment measures, increasing overall expenses.
- Location: The accessibility of the affected area plays a role.
- Crawl spaces and attics are harder to reach and may cost more.
- Visible areas like walls or ceilings are easier to treat, leading to lower costs.
- Severity of Contamination: Minor surface-level mold problems can be less expensive compared to deep-seated infestations that require structural repairs or replacements.
- Custom Requirements: Specific remediation needs like air quality tests, post-remediation inspections, or HEPA vacuuming may add extra charges.
Per Square Foot Costs for Mold Inspection Deltona FL
On average, mold removal costs range between $10 to $30 per square foot, depending on severity and environmental factors.
| Type of Area | Estimated Cost per Square Foot | Additional Notes |
| Surface-Level Wall Mold | $10 – $15 | Easier removal with minimal structural damage |
| Attic or Crawl Space Mold | $15 – $25 | Hard-to-reach areas requiring specialized tools |
| Black Mold Remediation | $20 – $30+ | Toxicity increases safety precautions & expense |
| Severe Structural Damage | $25+ | May require demolition or reconstruction |
Additional Cost Considerations for Mold Testing Deltona FL
- Initial Inspection Fees: Professional inspections can range from $200 to $600 depending on property size.
- Air Quality Testing: If airborne spores are suspected, testing may cost an additional $150–$300.
- Post-Treatment Verification: Ensuring successful remediation through third-party verification can add approximately $100–$200.
Affordable Solutions from a Mold Removal Company in Deltona FL
- Address mold issues early before they worsen.
- Properly ventilate spaces prone to moisture buildup (e. g. , bathrooms or basements).
- Use dehumidifiers in humid climates to prevent future growth.
By closely monitoring these variables and working with professionals experienced in accurate estimates, you can better prepare for this necessary process while keeping your budget on track.
Common Spaces Affected by Mold Growth and How to Address Them
Mold can grow in various parts of a home, often thriving in areas with high humidity, poor ventilation, or water damage. Understanding the most common spaces affected by mold growth is essential for prevention and remediation. Below, we’ll delve into these spaces and provide actionable strategies for addressing mold issues effectively.
Why Bathrooms Are at Risk:
Bathrooms are one of the most common spaces for mold growth due to frequent exposure to moisture from showers, baths, and sinks. Poor ventilation or inadequate exhaust fans often exacerbate the problem.
How to Address Bathroom Mold:
– Improve Ventilation:Install or upgrade an exhaust fan to reduce moisture levels.Fix Leaks Promptly:Repair any leaking pipes, faucets, or showerheads.Use Mold-Resistant Materials:Opt for mold-resistant paint or grout when renovating your bathroom. – Regularly clean tiles and grout with a mixture of water and vinegar or baking soda.
Why Kitchens Are at Risk:
Kitchens can become breeding grounds for mold because of steam from cooking, leaky sinks or dishwashers, and food waste disposal areas.
How to Address Kitchen Mold:
– Check under sinks regularly for leaks or standing water. – Store food properly and clean out expired items from the refrigerator. – Wipe down surfaces after cooking to prevent moisture buildup. – Use a dehumidifier if your kitchen tends to stay humid.
Why Basements Are at Risk:
Basements are prone to mold growth due to their location below ground level. They often have higher humidity levels, potential flooding issues, or improper insulation.
How to Address Basement Mold:
| Common Issue | Solution | |—————————|———————————————-| | High Humidity | Use a dehumidifier consistently. | | Leaky Foundations | Seal cracks in walls or floors with epoxy. | | Stored Items | Avoid storing cardboard boxes; use plastic bins instead.
Additionally, ensure that gutters are diverting rainwater away from your home’s foundation.
Why Attics Are at Risk:
Poor insulation and inadequate ventilation in attics can trap warm air during winter months, leading to condensation that fosters mold growth.
How to Address Attic Mold:
– Install proper attic ventilation systems such as ridge vents or soffit vents. – Ensure insulation is evenly distributed throughout the attic space. – Inspect roofs regularly for leaks that could allow water intrusion. – Remove stored items that block airflow within the attic space.
Why HVAC Systems Are at Risk:
Heating and cooling systems can circulate spores throughout your home if mold develops within ducts or filters due to condensation buildup.
How to Address HVAC Mold:
1. Replace air filters regularly (every 1–3 months). 2. Clean ducts professionally every few years. 3. Inspect drip pans for standing water and clear out any clogs promptly. 4. Ensure ductwork is well-sealed against external contaminants.
Proactive Steps for All Areas
- Maintain indoor humidity levels between 30–50%.
- Regularly inspect areas prone to leaks (e. g. , plumbing under sinks).
- Dry wet areas within 24–48 hours after spills or flooding events occur.
By staying proactive with maintenance and addressing high-risk spaces promptly, homeowners can mitigate long-term damage caused by untreated mold infestations while maintaining a healthy living environment overall.
Detailed Insights into the Mold Abatement Timeline for Your Home
Mold abatement is a critical process to ensure the safety and health of your home. Understanding the timeline can help you plan effectively and reduce stress during this important procedure. The duration of mold remediation depends on factors such as the severity of the infestation, the size of the affected area, and whether professional services are involved. Below is a breakdown of what to expect when addressing mold in your home.
1.Assessment and Inspection (1-3 Days)
The first step involves identifying the extent of mold growth.
– The size of your property.
– Access to affected areas (e. g. , basements, crawlspaces).
– The need for testing samples in a lab for detailed analysis.
A professional inspector will also identify moisture sources that contribute to mold growth, such as leaks or high humidity levels.
2.Preparation for Mold Removal (1 Day)
Once mold has been identified, preparing the area is essential to minimize contamination:
– Setting up containment zones with plastic sheeting and negative air pressure systems (to prevent spores from spreading).
– Removing furniture, fabrics, or personal items from affected areas for cleaning or disposal.
– Ensuring proper protective equipment (PPE), such as gloves, masks, and suits, is available for workers or homeowners performing DIY abatement.
3.Mold Removal Process (1-7 Days Depending on Severity)
| Type of Mold Infestation | Estimated Timeframe | Example Areas |
| Small Surface Mold | 1 Day | Bathroom tiles, window sills |
| Moderate Growth | 2-4 Days | Walls, flooring under carpets |
| Severe Growth | 5-7 Days | HVAC systems, drywall replacement |
Removal techniques include:
– Scrubbing nonporous surfaces with antifungal cleaners. – Disposing of porous materials like drywall or carpeting that cannot be salvaged. – Using HEPA-vacuuming equipment to remove airborne spores post-cleanup.
4.Drying and Dehumidification (3-5 Days)
After removing visible mold growth, drying out affected areas is crucial:
– Industrial-grade dehumidifiers are used to lower moisture levels in walls, floors, or air. – Fans may also be installed strategically to improve airflow.
This phase ensures that hidden dampness does not lead to recurring mold issues.
5.Repair and Restoration (Varies Based on Damage)
If structural materials were removed during remediation—like drywall or insulation—restoration might be necessary:
– Minor repairs may take a few hours or days. – Larger-scale restorations involving entire walls or floors may extend this phase by several weeks.
Tips for Homeowners During Mold Abatement
To ensure smooth progress during this process:
1. Relocate temporarily if remediation affects large parts of your living space (especially if you have respiratory sensitivities).
2. Communicate regularly with contractors about project timelines and adjustments needed due to unforeseen damage. 3. Follow any post-remediation advice provided by professionals regarding ongoing moisture control measures.
Addressing a mold issue promptly while understanding its timeline helps maintain not only your home’s integrity but also its habitability over time.
Identifying and Removing Fabric Mold from Household Materials
Fabric mold is a common issue that can affect clothing, furniture upholstery, curtains, carpets, and other household materials. Mold thrives in damp, humid environments and can quickly spread on porous surfaces like fabric. Identifying and addressing fabric mold promptly is crucial to prevent damage to belongings and avoid potential health risks.
Signs of Mold on Fabrics
Detecting fabric mold early ensures easier removal.
- Visible Spots or Stains: Mold often appears as dark green, black, or white spots on fabrics.
- Musty Odor: A persistent musty smell may indicate hidden mold growth.
- Texture Changes: Affected fabrics may feel slimy or damp due to moisture retention.
- Deterioration of Material: Prolonged exposure to mold can weaken fibers and cause the fabric to decay.
Steps for Removing Fabric Mold
Tackling mold on fabrics requires careful attention to ensure effective cleaning without further spreading spores.
- Determine whether the item is salvageable. If the mold has caused severe structural damage or if the material cannot handle cleaning treatments (e. g. , delicate silk), consider discarding it.
- White Vinegar Solution: Mix 1 part vinegar with 3 parts water.
- Baking Soda Paste: Combine baking soda with water for spot treatments.
- Commercial Mold Cleaners: Ensure they are safe for fabrics by checking the label.
- Gently brush off loose spores outdoors using a soft-bristle brush to avoid spreading them indoors.
- Apply your chosen cleaning solution directly to the affected areas.
- Machine-wash washable fabrics using hot water (if safe for the material). Add half a cup of white vinegar during the rinse cycle for extra mold-fighting power.
- For non-machine washable items, hand wash them using soapy warm water mixed with vinegar.
- Dry items outdoors under direct sunlight when possible; UV rays help kill remaining spores.
- Avoid leaving damp fabrics indoors as this encourages further fungal growth.
Preventing Future Fabric Mold Growth
Prevention is key when it comes to avoiding recurring issues with fabric mold.
- Maintain indoor humidity levels below 50% using dehumidifiers or air conditioning units.
- Store clothing and textiles in dry locations away from moisture-prone areas like basements or attics.
- Wash and completely dry items immediately after exposure to water (e. g. , wet towels or damp clothes).
- Use silica gel packets or moisture absorbers in storage containers.
| Cleaning Solution | Effectiveness | Best Used For |
| White Vinegar | Highly Effective | General use on most fabrics |
| Baking Soda | Moderate | Spot treatment for small patches |
| Commercial Cleaners | Effective | Stubborn cases (check label suitability) |
When Professional Help Is Necessary
If fabric mold persists despite multiple cleaning attempts, it may be time to consult professionals who specialize in textile restoration and deep-cleaning services. This is especially important for valuable or antique items that require careful handling.
By promptly addressing fabric mold issues and taking preventive measures, you can protect your household materials while maintaining a healthy living environment free from harmful spores.
Recognizing and Addressing HVAC Mold to Improve Air Quality
Mold growth in HVAC (Heating, Ventilation, and Air Conditioning) systems is a serious concern for homeowners. Not only can it compromise the efficiency of the system, but it can also negatively affect indoor air quality, leading to potential health risks. Understanding how to recognize HVAC mold and addressing it promptly is essential for maintaining a healthy living environment.
Signs of Mold in Your HVAC System
Identifying mold in your HVAC system early on can help mitigate its spread.
- Musty Odors:A persistent musty smell when your HVAC system operates is often an indicator of mold.
- Visible Mold Growth:Mold may appear around vents, drip pans, or internal components like coils.
- Allergy Symptoms:Increased allergic reactions such as sneezing, coughing, or difficulty breathing when indoors could signal mold contamination.
- Humidity Issues:Excess moisture within or near your system can promote mold development.
Causes of Mold in HVAC Systems
- Excess Moisture:Condensation from cooling coils or improper drainage mechanisms is a leading cause.
- Poor Ventilation:Limited airflow encourages humidity buildup.
- Dirty Ducts or Filters:Accumulated dust acts as a food source for mold spores.
- Temperature Variations:Warm environments with trapped moisture create ideal conditions for mold growth.
Steps to Remove Mold from an HVAC System
- Turn Off the System:Ensure that the system is powered down to prevent further spread of spores during cleaning.
- Check drip pans for water pooling.
- Assess ductwork and insulation materials for visible contamination.
- Use EPA-approved mold cleaners on non-porous surfaces like metal ducts and coils.
- Replace filters immediately with high-efficiency particulate air (HEPA) options if possible.
- Discard excessively damaged insulation or porous components that cannot be cleaned effectively.
- Apply an antimicrobial treatment across surfaces inside the ductwork to minimize recurrence.
Note: Always wear personal protective equipment (PPE), such as gloves and respiratory masks during this process.
When to Call a Professional
| Scenario | Why Professional Help is Necessary |
| Widespread Mold Contamination | Professionals have specialized tools to handle large-scale infestations safely. |
| Health Concerns | Individuals with asthma or allergies should avoid exposure during cleanup efforts. |
| Structural Damage | Extensive repairs may require expertise beyond standard cleaning protocols. |
Preventing Future Growth in Your HVAC System
- Maintain indoor humidity levels below 50%.
- Perform routine maintenance such as cleaning drip pans and inspecting condensation lines.
- Replace air filters regularly (every 1–3 months depending on use).
- Schedule annual professional inspections for ducts and overall system performance.
By recognizing signs early and implementing effective solutions, homeowners can ensure their HVAC systems remain free from harmful mold while safeguarding indoor air quality for everyone in their household.
Top Methods for Effective and Safe Mold Removal in Residential Properties
Mold removal is a critical process for maintaining a safe and healthy living environment. When dealing with mold in your home, it’s essential to use effective and safe methods to ensure the issue is completely resolved while minimizing harm to your property and health. Below, we outline some of the top methods used for residential mold remediation, along with best practices to follow.
Mold thrives in damp environments, so identifying and addressing the moisture source is the first step toward effective removal. Without eliminating this underlying issue, mold is likely to return even after cleanup efforts.
- Leaking pipes or plumbing fixtures
- Poor ventilation in bathrooms or kitchens
- Roof leaks or water intrusion from damaged gutters
- Condensation from HVAC systems
Fixing these problems should be prioritized before beginning mold remediation.
To prevent mold spores from spreading throughout your home during cleanup, containment measures are vital. Professionals often use physical barriers like plastic sheeting or negative air pressure machines to isolate the affected area.
- Closing off doors and vents leading to other parts of the house
- Using HEPA air filters during cleanup
Effective containment ensures that spores remain localized.
Different surfaces require different cleaning approaches depending on their material type and extent of contamination.
| Surface Type | Cleaning Method | Recommended Products |
| Porous materials (e.g., drywall) | Remove and replace if heavily infested | N/A – replacement required |
| Non-porous surfaces (e.g., tiles) | Scrubbing with detergent/water solution | Bleach, hydrogen peroxide (use sparingly) |
| Fabrics (e.g., upholstery) | Laundry wash or professional treatment | Mild laundry detergent |
Ensure that you wear gloves and masks when using cleaning agents.
After cleaning visible mold colonies, it’s essential to remove residual spores that may linger on surfaces like carpets or furniture. High-Efficiency Particulate Air (HEPA) vacuum cleaners are highly effective at trapping fine particles such as mold spores without releasing them back into the air.
- Prevents spores from resettling elsewhere in your home
- Reduces allergen levels for improved indoor air quality
Once vacuuming is complete, ensure proper disposal of vacuum bags or filters in sealed plastic bags.
While DIY methods may work for minor infestations, larger mold issues often require specialized expertise.
- Mold covers an area larger than 10 square feet
- The infestation has spread into HVAC systems
- Individuals in your household have respiratory conditions aggravated by mold exposure
Professionals have access to advanced tools like infrared cameras for moisture detection and industrial-grade antimicrobial treatments.
Key Safety Tips During Mold Removal Process
- Always wear personal protective equipment (PPE), such as gloves, goggles, and N95 respirators.
- Avoid mixing cleaning agents like bleach with ammonia.
- Ensure adequate ventilation during cleanup.
Taking such precautions minimizes exposure risks during remediation efforts.
By using these proven techniques alongside preventive measures like managing humidity levels indoors, homeowners can ensure long-term protection against harmful molds.
Top Methods for Effective and Safe Mold Removal in Residential Properties
Removing mold from residential properties requires a methodical and safe approach to protect both the individuals living in the home and the structural integrity of the property. Below are some of the most effective and safe ways to handle mold removal, along with important steps to prevent its recurrence.
1.Identify and Isolate Affected Areas
To begin, it’s essential to locate the areas impacted by mold growth.
- Conducting a thorough inspection of spaces prone to moisture accumulation, such as basements, bathrooms, kitchens, or crawl spaces.
- Using proper protective equipment (e. g. , gloves, masks, goggles) during inspection to avoid exposure to mold spores.
- Sealing off affected areas with plastic sheeting or barriers to prevent spores from spreading during removal.
2.Choose Appropriate Cleaning Agents
Using the right cleaning solution is critical when dealing with mold.
- Vinegar: A natural solution that kills up to 82% of mold species on porous surfaces like wood and drywall. It’s non-toxic and safe for homes with children or pets.
- Bleach: Effective for non-porous surfaces like tiles or countertops but not suitable for porous materials as it doesn’t penetrate deeply enough.
- Hydrogen Peroxide: Both a disinfectant and antifungal agent that works on various surfaces without harmful fumes.
- Commercial Mold Cleaners: Formulated specifically for stubborn infestations; always follow manufacturer instructions.
3.Physical Removal Techniques
| Surface Type | Recommended Methodology |
| Porous (e.g., drywall) | Cut out affected material entirely if heavily damaged. |
| Non-Porous (e.g., tile) | Scrub using brushes paired with appropriate cleaning agents. |
| Fabric Materials | Launder them in hot water where possible or dispose if damage is extensive. |
Always work gently when handling fragile materials while ensuring complete removal of visible growth.
4.Invest in Air Filtration Devices
Airborne mold spores can linger even after surface-level cleaning is complete.
- Use HEPA-filtered vacuums when cleaning areas post-remediation.
- Consider installing portable air purifiers equipped with HEPA filters in high-moisture rooms.
- Regularly replace HVAC filters, especially if HVAC systems were exposed to mold spores.
5.Dry and Dehumidify Affected Areas Post-Cleanup
- Use dehumidifiers to maintain indoor humidity levels below 50%.
- Repair leaks in roofs, walls, or plumbing systems promptly.
- Increase ventilation by opening windows or installing exhaust fans in humidity-prone spaces like bathrooms.
6.When Should You Call a Professional?
- If the affected area exceeds 10 square feet based on EPA guidelines.
- When dealing with toxic molds such as Stachybotrys chartarum(commonly known as “black mold”), which requires specialized handling equipment.
- In situations involving HVAC systems – professionals can thoroughly clean ductwork without spreading spores throughout your home.
By following these top methods for addressing residential mold safely and effectively, homeowners can restore their living environments while minimizing risks associated with improper cleanup practices.
- The Importance of Prompt Mold Removal Deltona FL to Protect Your Home
- Mold Removal Deltona FL: How to Spot It After Water Damage and Prevent Future Issues
- Mold Removal Deltona FL: Understanding the Difference Between Abatement and Remediation
- What to Expect During Mold Remediation in Deltona FL and How Much It Costs
- Effective Mold Remediation Deltona FL: 3 Signs of Black Mold and How to Remove It
- Essential Tips for Mold Inspection Deltona FL: How to Spot Black Mold and Expert Tips for Mold Removal Deltona FL
- How to Determine If You Need Mold Removal Deltona FL Services
- Understanding Mold Remediation Deltona FL: Key Differences from Mold Removal
- Understanding Mold Removal Deltona FL: Costs and Key Factors to Consider